
· 14 min read
Running A-Parser at Home or the Office: Secure Remote Access Behind NAT Without a VPS
Special thanks to A-Parser user Reset for the article idea and the original draft of this guide.
Table of Contents
- The Economics: Why Pay Hosting Providers If You Don’t Scrape Every Day?
- The CGNAT Problem and Why Remote Desktops Aren’t Always Convenient
- How Cloudflare Tunnel Works and What It Protects
- Step-by-Step Cloudflare Tunnel Setup
- Deployment Option A: Run cloudflared as a System Service
- Deployment Option B: Docker Compose
- Optional: Extra Layer of Protection with Cloudflare Access
- FAQ: Frequently Asked Questions and Security
- Alternative If You Do Not Have a Domain: Setting Up Ngrok
- Summary & Comparison: Cloudflare vs. Ngrok vs. VPS
1. The Economics: Why Pay Hosting Providers If You Don’t Scrape Every Day?
Many users buy an A-Parser license to avoid recurring SaaS fees. But if they run tasks only occasionally, they may still rent a VPS. VPS plans are usually billed monthly, and the price depends on the configuration and provider.
That creates a familiar problem:
- Scraping in bursts: You might only need to scrape an outreach lead list once a week, check project rankings, or grab a competitor’s product catalog a couple of times a month.
- Paying for a full month for just a few hours of runtime: High-performance server plans are typically billed monthly. For example, a $25–$50 monthly plan costs $300–$600 per year. This is an example calculation, not a universal VPS price. With cloud virtual machines, providers may continue billing for persistent disk storage and reserved static IP addresses even while the machine is powered off.
- Keeping costs proportional: When testing a new workflow or running a small side project, recurring server costs may be hard to justify for occasional work.
Why a Home or Office Computer Can Be Practical for Occasional Tasks:
1. The hardware is already paid for: Your personal workstation, office desktop, or an idle laptop may already be available. Depending on its configuration, it may offer more resources than the VPS you would otherwise rent — without an additional server fee. 2. Broadband without separate bandwidth surcharges: On standard unmetered home or office broadband plans, a 300–1000 Mbps uplink lets you operate without per-gigabyte bandwidth fees.
The remaining question is how to manage A-Parser remotely. You may want to monitor a batch job, manage queues, or download completed results from a laptop, smartphone, or tablet while it runs on your home or office computer.
This is the problem an outbound tunnel solves.
2. The CGNAT Problem and Why Remote Desktops Aren’t Always Convenient
The main obstacle to self-hosting at home or in an office is Carrier-Grade NAT (CGNAT), which often leaves the connection without a public IP address:
- You don’t have a dedicated public IPv4 address;
- Port forwarding on your local router may not work because the ISP controls the upstream NAT;
- Static public IPs may be unavailable or costly: Mobile and fixed broadband providers may not offer public IP addresses on every plan, or may charge an additional monthly fee. Exposing a home or office service directly to the internet also subjects it to automated scanning and login attempts.
A common workaround: Use a remote desktop tool such as AnyDesk, TeamViewer, or RDP.
The downsides:
- No separate web address: A remote desktop gives you access to the computer’s desktop rather than a browser address for the dashboard;
- Cumbersome file downloads: Grabbing scraped results requires transferring files through the remote desktop client UI rather than downloading them directly via your browser.
What we want instead: Open https://aparser.my-domain.com in a browser on a phone or laptop to access the A-Parser dashboard.
3. How Cloudflare Tunnel Works and What It Protects
With a traditional setup, remote access usually requires opening router ports and exposing a local IP address to the public internet.
Cloudflare Tunnel works in reverse via an outbound-only connection: The cloudflared agent running on your machine initiates a secure outbound connection to Cloudflare’s network. From the local network’s perspective, this is an outbound connection, so port forwarding and a public IP are not required.
Important: Scraping Traffic Does Not Flow Through Cloudflare Tunnel
Users may wonder whether large scraping jobs affect the tunnel. The two traffic flows are separate:
- Dashboard Traffic (via Cloudflare): When you open the dashboard at
aparser.my-domain.com, the tunnel carries interface actions, configuration changes, and log updates. - Scraping Operations (Direct to Target Sites): The A-Parser engine queries target websites through your local network interface and configured proxies. This traffic does not traverse Cloudflare Tunnel.
| Traffic Stream | Routing Path | Data Volume |
|---|---|---|
| Control & Monitoring | Browser ➡️ Cloudflare ➡️ Local Port 9091 | Dashboard traffic only |
| Scraping | A-Parser Engine ➡️ Your Proxies ➡️ Target Websites | Depends on the workload; sent directly to target sites |
This setup does not require an inbound router port for dashboard access, and the tunnel carries only dashboard traffic rather than scraping requests.
Cloudflare Tunnel documentation.
4. Step-by-Step Cloudflare Tunnel Setup
Requirements: a free Cloudflare account and a domain delegated to Cloudflare DNS.
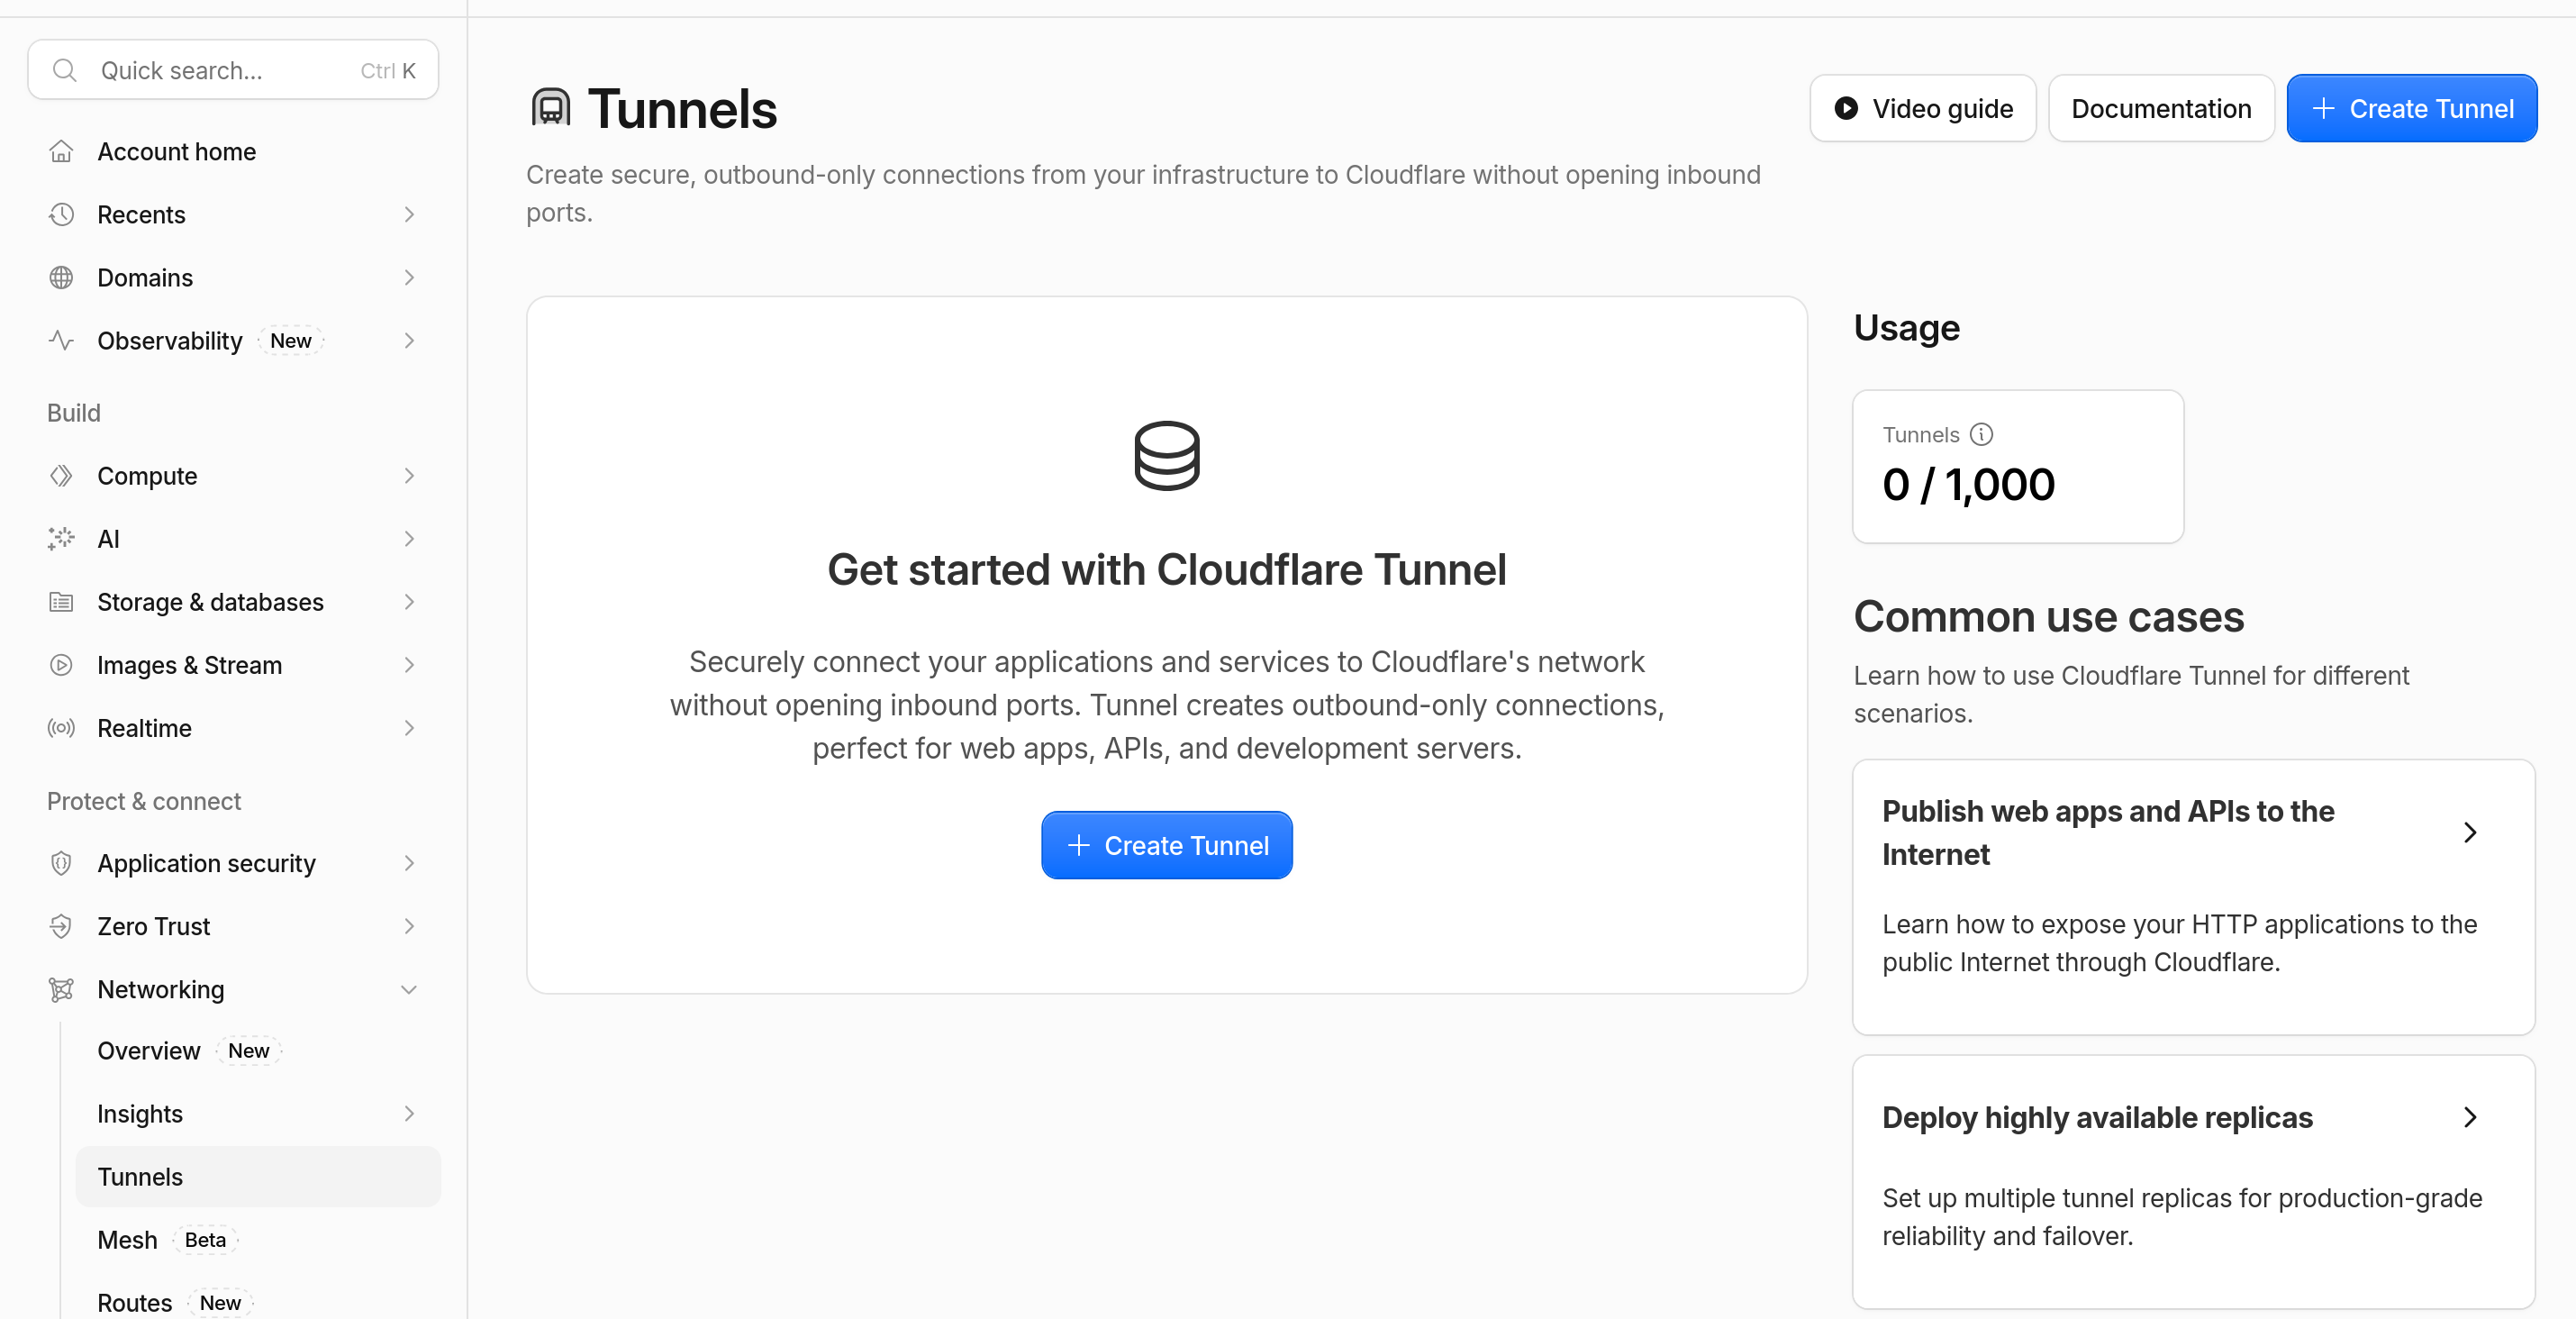
Note: Cloudflare Tunnels can be created in the main dashboard (Protect & connect → Networking → Tunnels) without entering a credit card. Cloudflare documents a limit of up to 1,000 tunnels per account.
Step 1. Navigate to Networking → Tunnels
1. Log in to the Cloudflare dashboard. 2. In the left sidebar, locate Protect & connect and click Networking → Tunnels. 3. Click the blue + Create Tunnel button.
Step 2. Select Connector and Name Your Tunnel
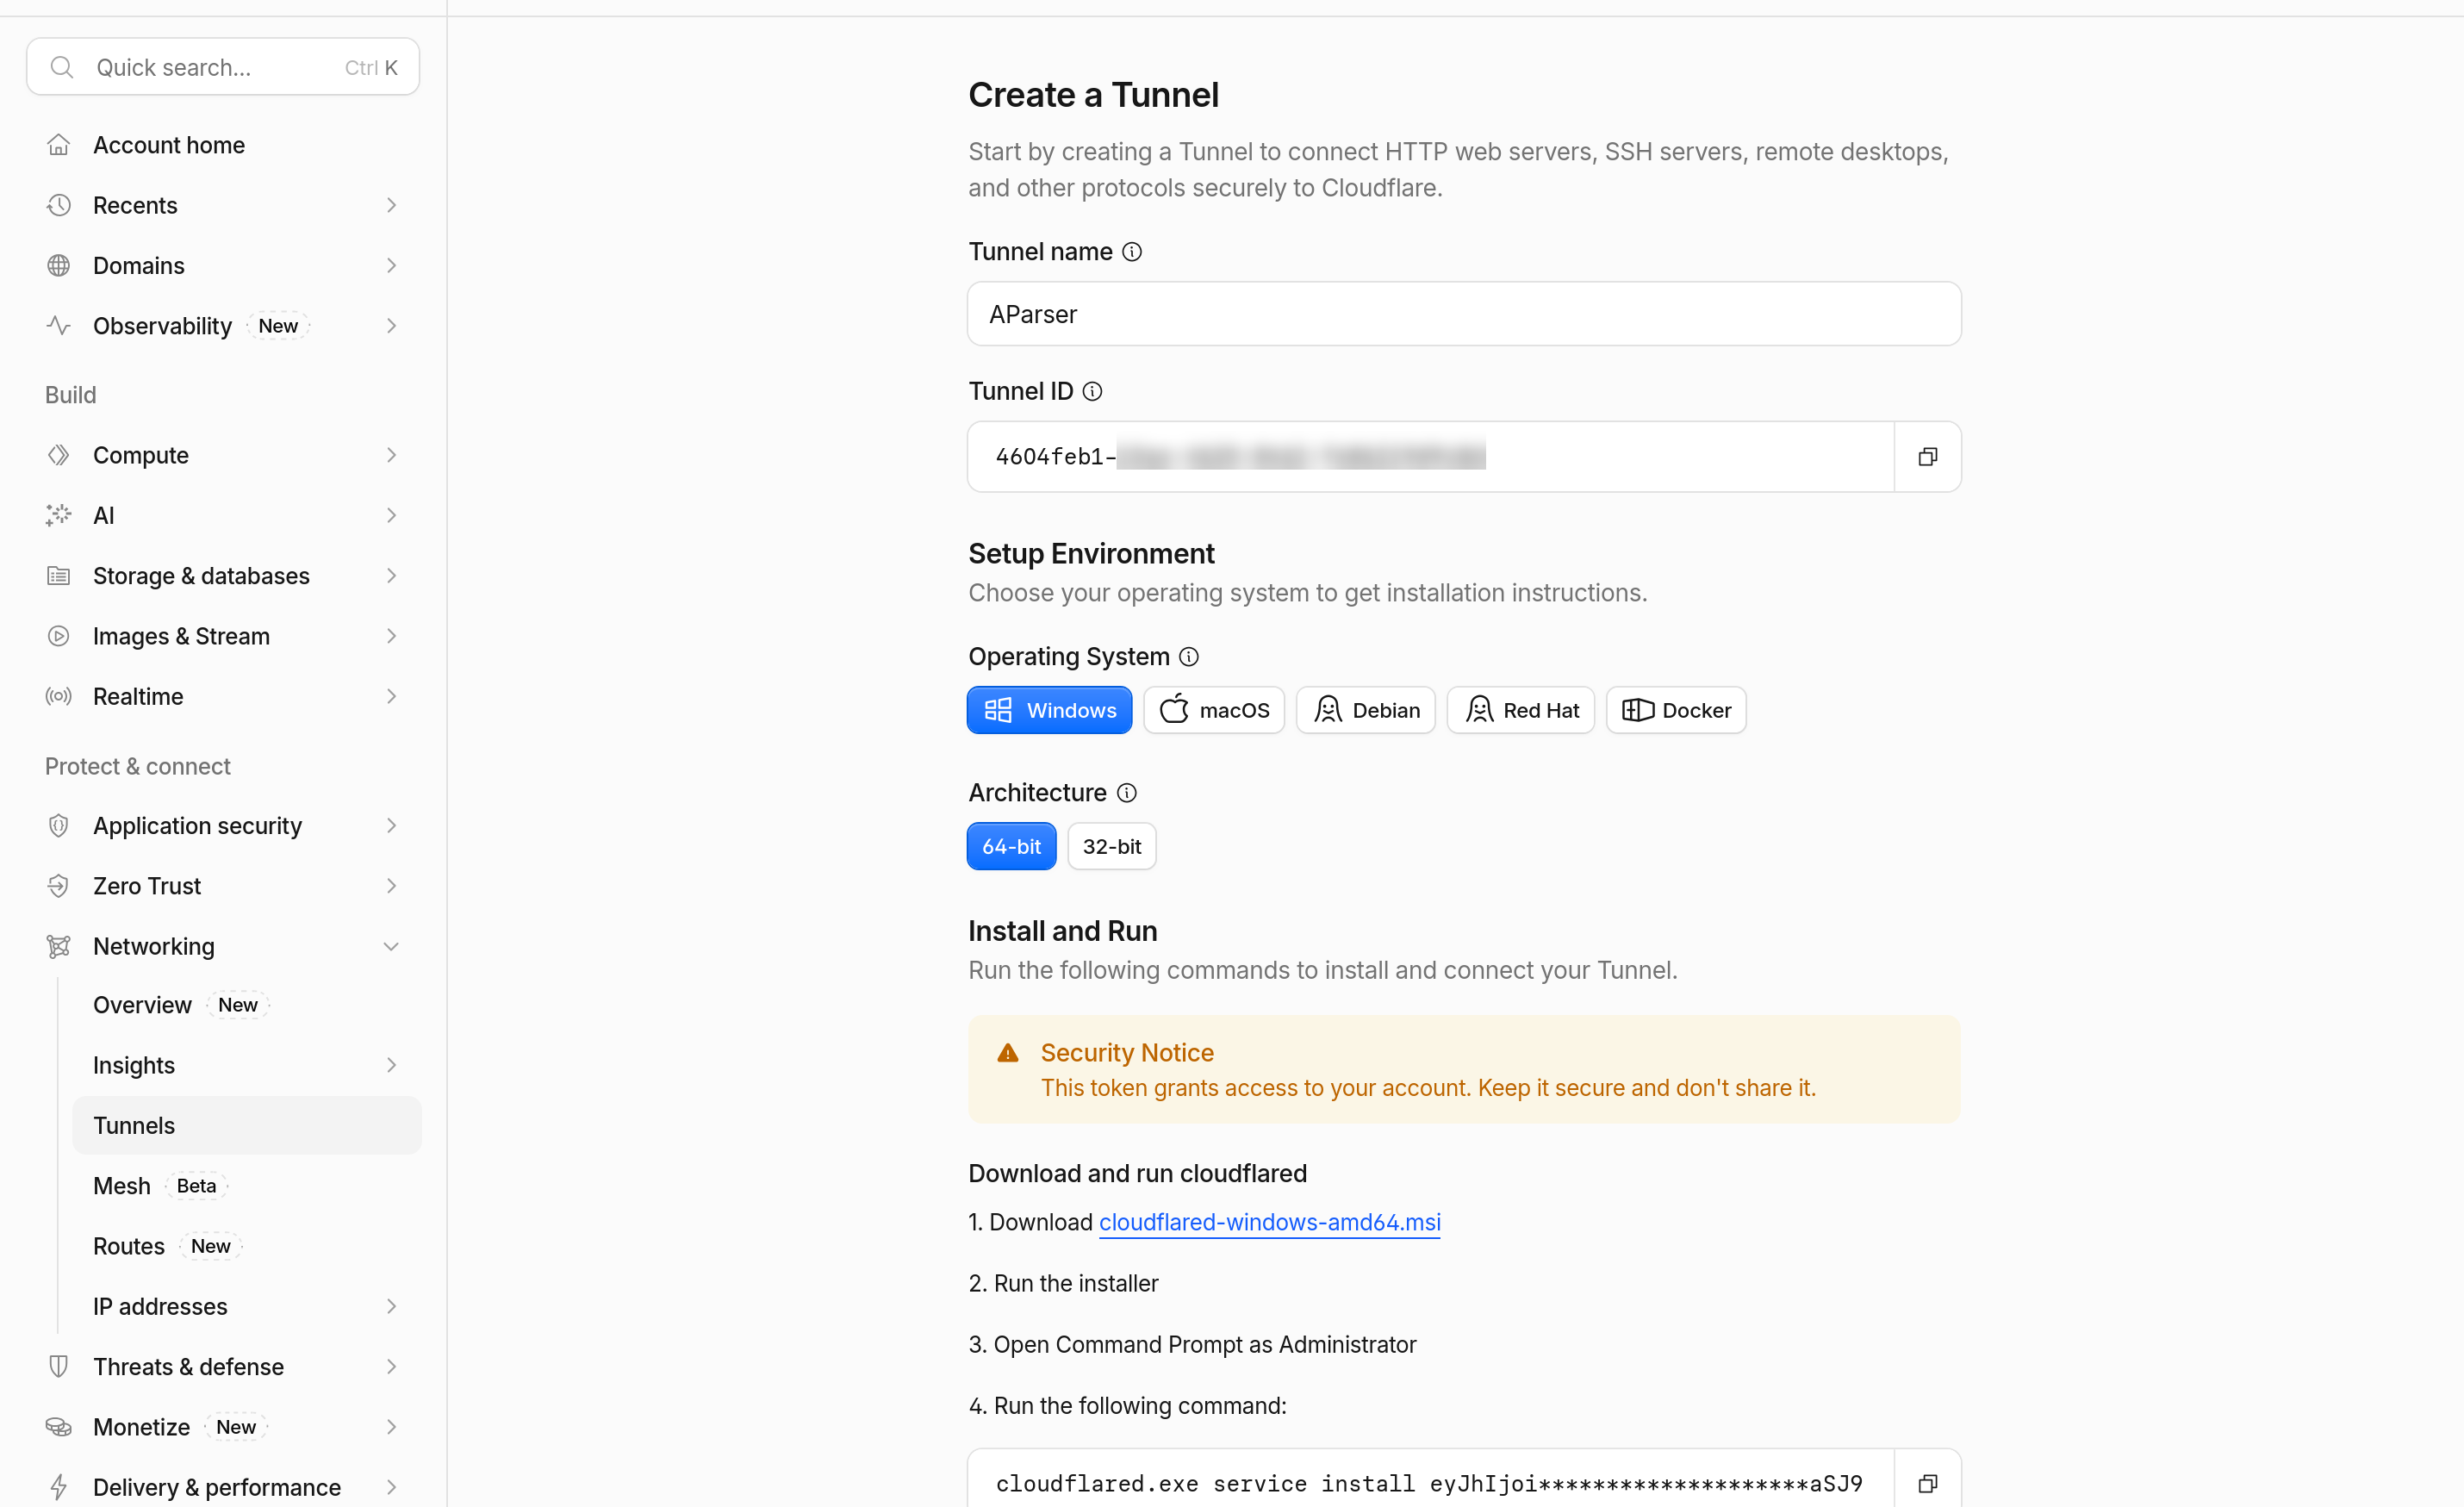
1. In the creation wizard, keep the default connector type — Cloudflared — and click Next. 2. In the Name your tunnel field, enter a descriptive label (such as AParser) and click Save tunnel.
5. Deployment Option A: Run cloudflared as a System Service
Ideal when A-Parser is installed natively on your host operating system.
Step 3. Install the Connector
1. On the Install and run connectors screen, select your target operating system (e.g., Windows / 64-bit or Debian / Ubuntu / macOS). 2. For Windows, follow the on-screen steps:
- Download the
cloudflared-windows-amd64.msiinstaller; - Run the installation;
- Open Command Prompt (CMD) or PowerShell as Administrator;
- Execute the service installation command containing your unique token:
cloudflared.exe service install eyJh...YOUR_TOKEN...
For Linux or macOS, select your distribution and run the corresponding command from the dashboard with your token.
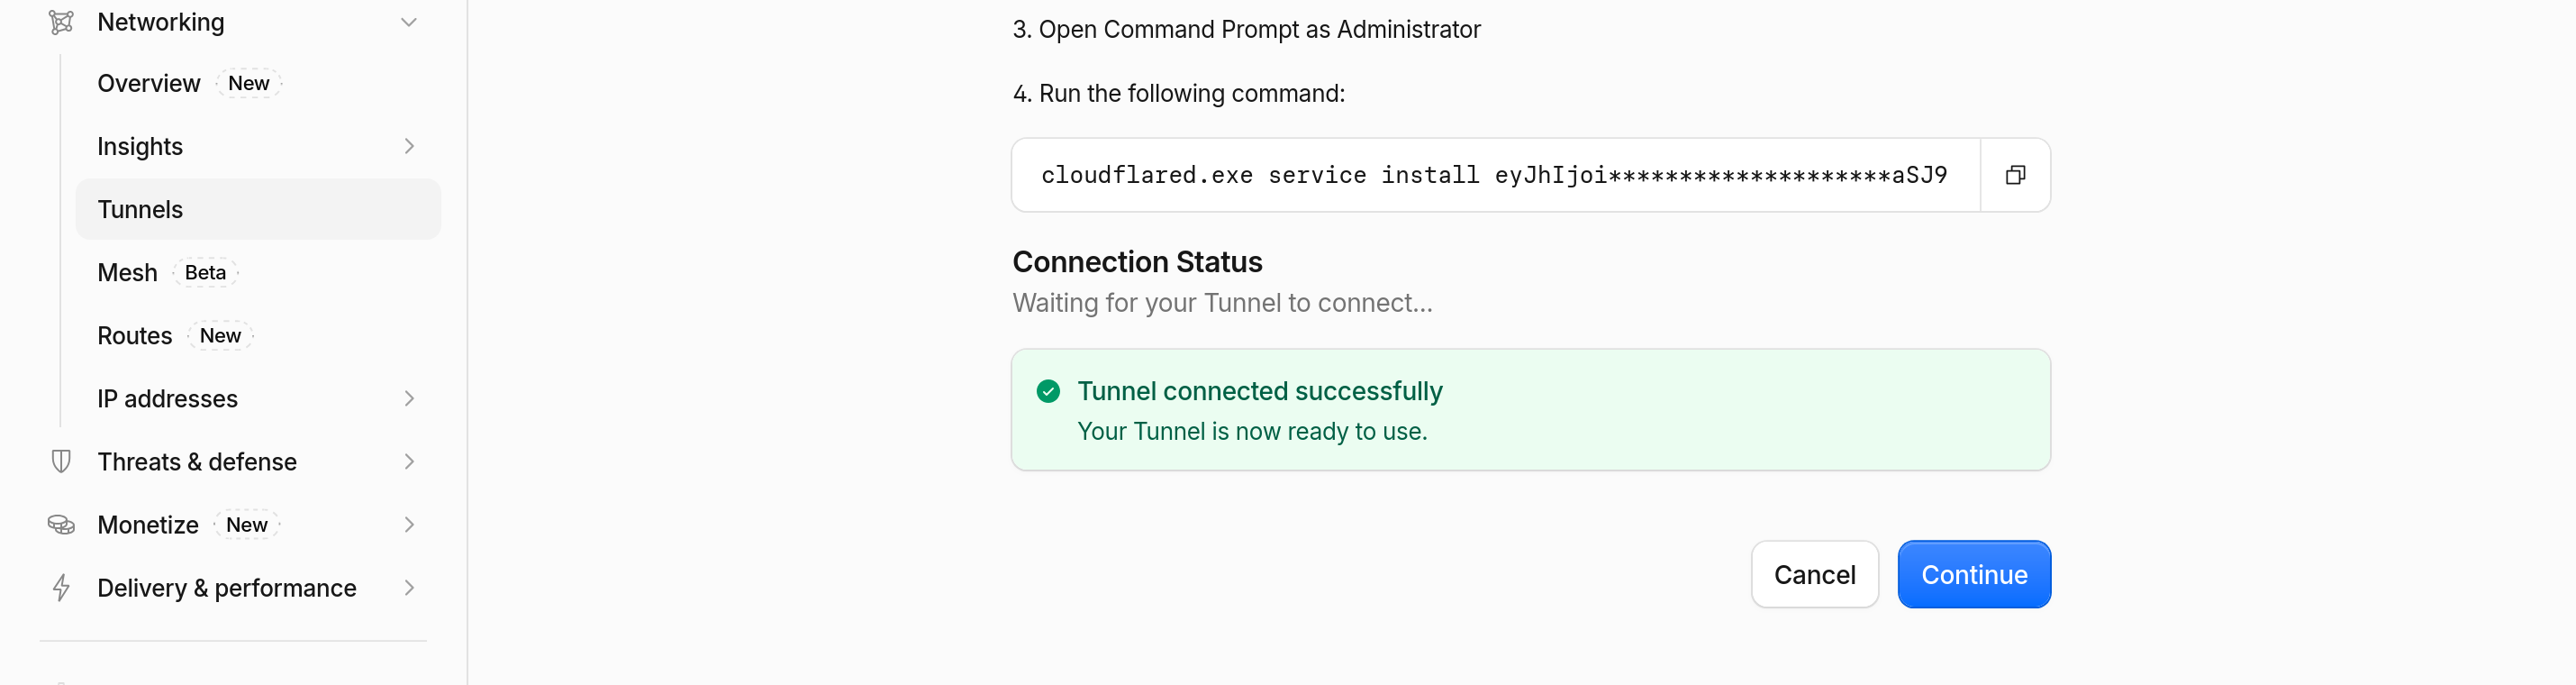
3. Once the service connects, a green confirmation banner appears at the bottom: ✔ Tunnel connected successfully. Your Tunnel is now ready to use.
Step 4. Configure Traffic Routing (Routes)
Now link the tunnel to the A-Parser dashboard:
1. In your Tunnels list, click on the newly created AParser tunnel and switch to the Routes tab. 2. Click the + Add route button.
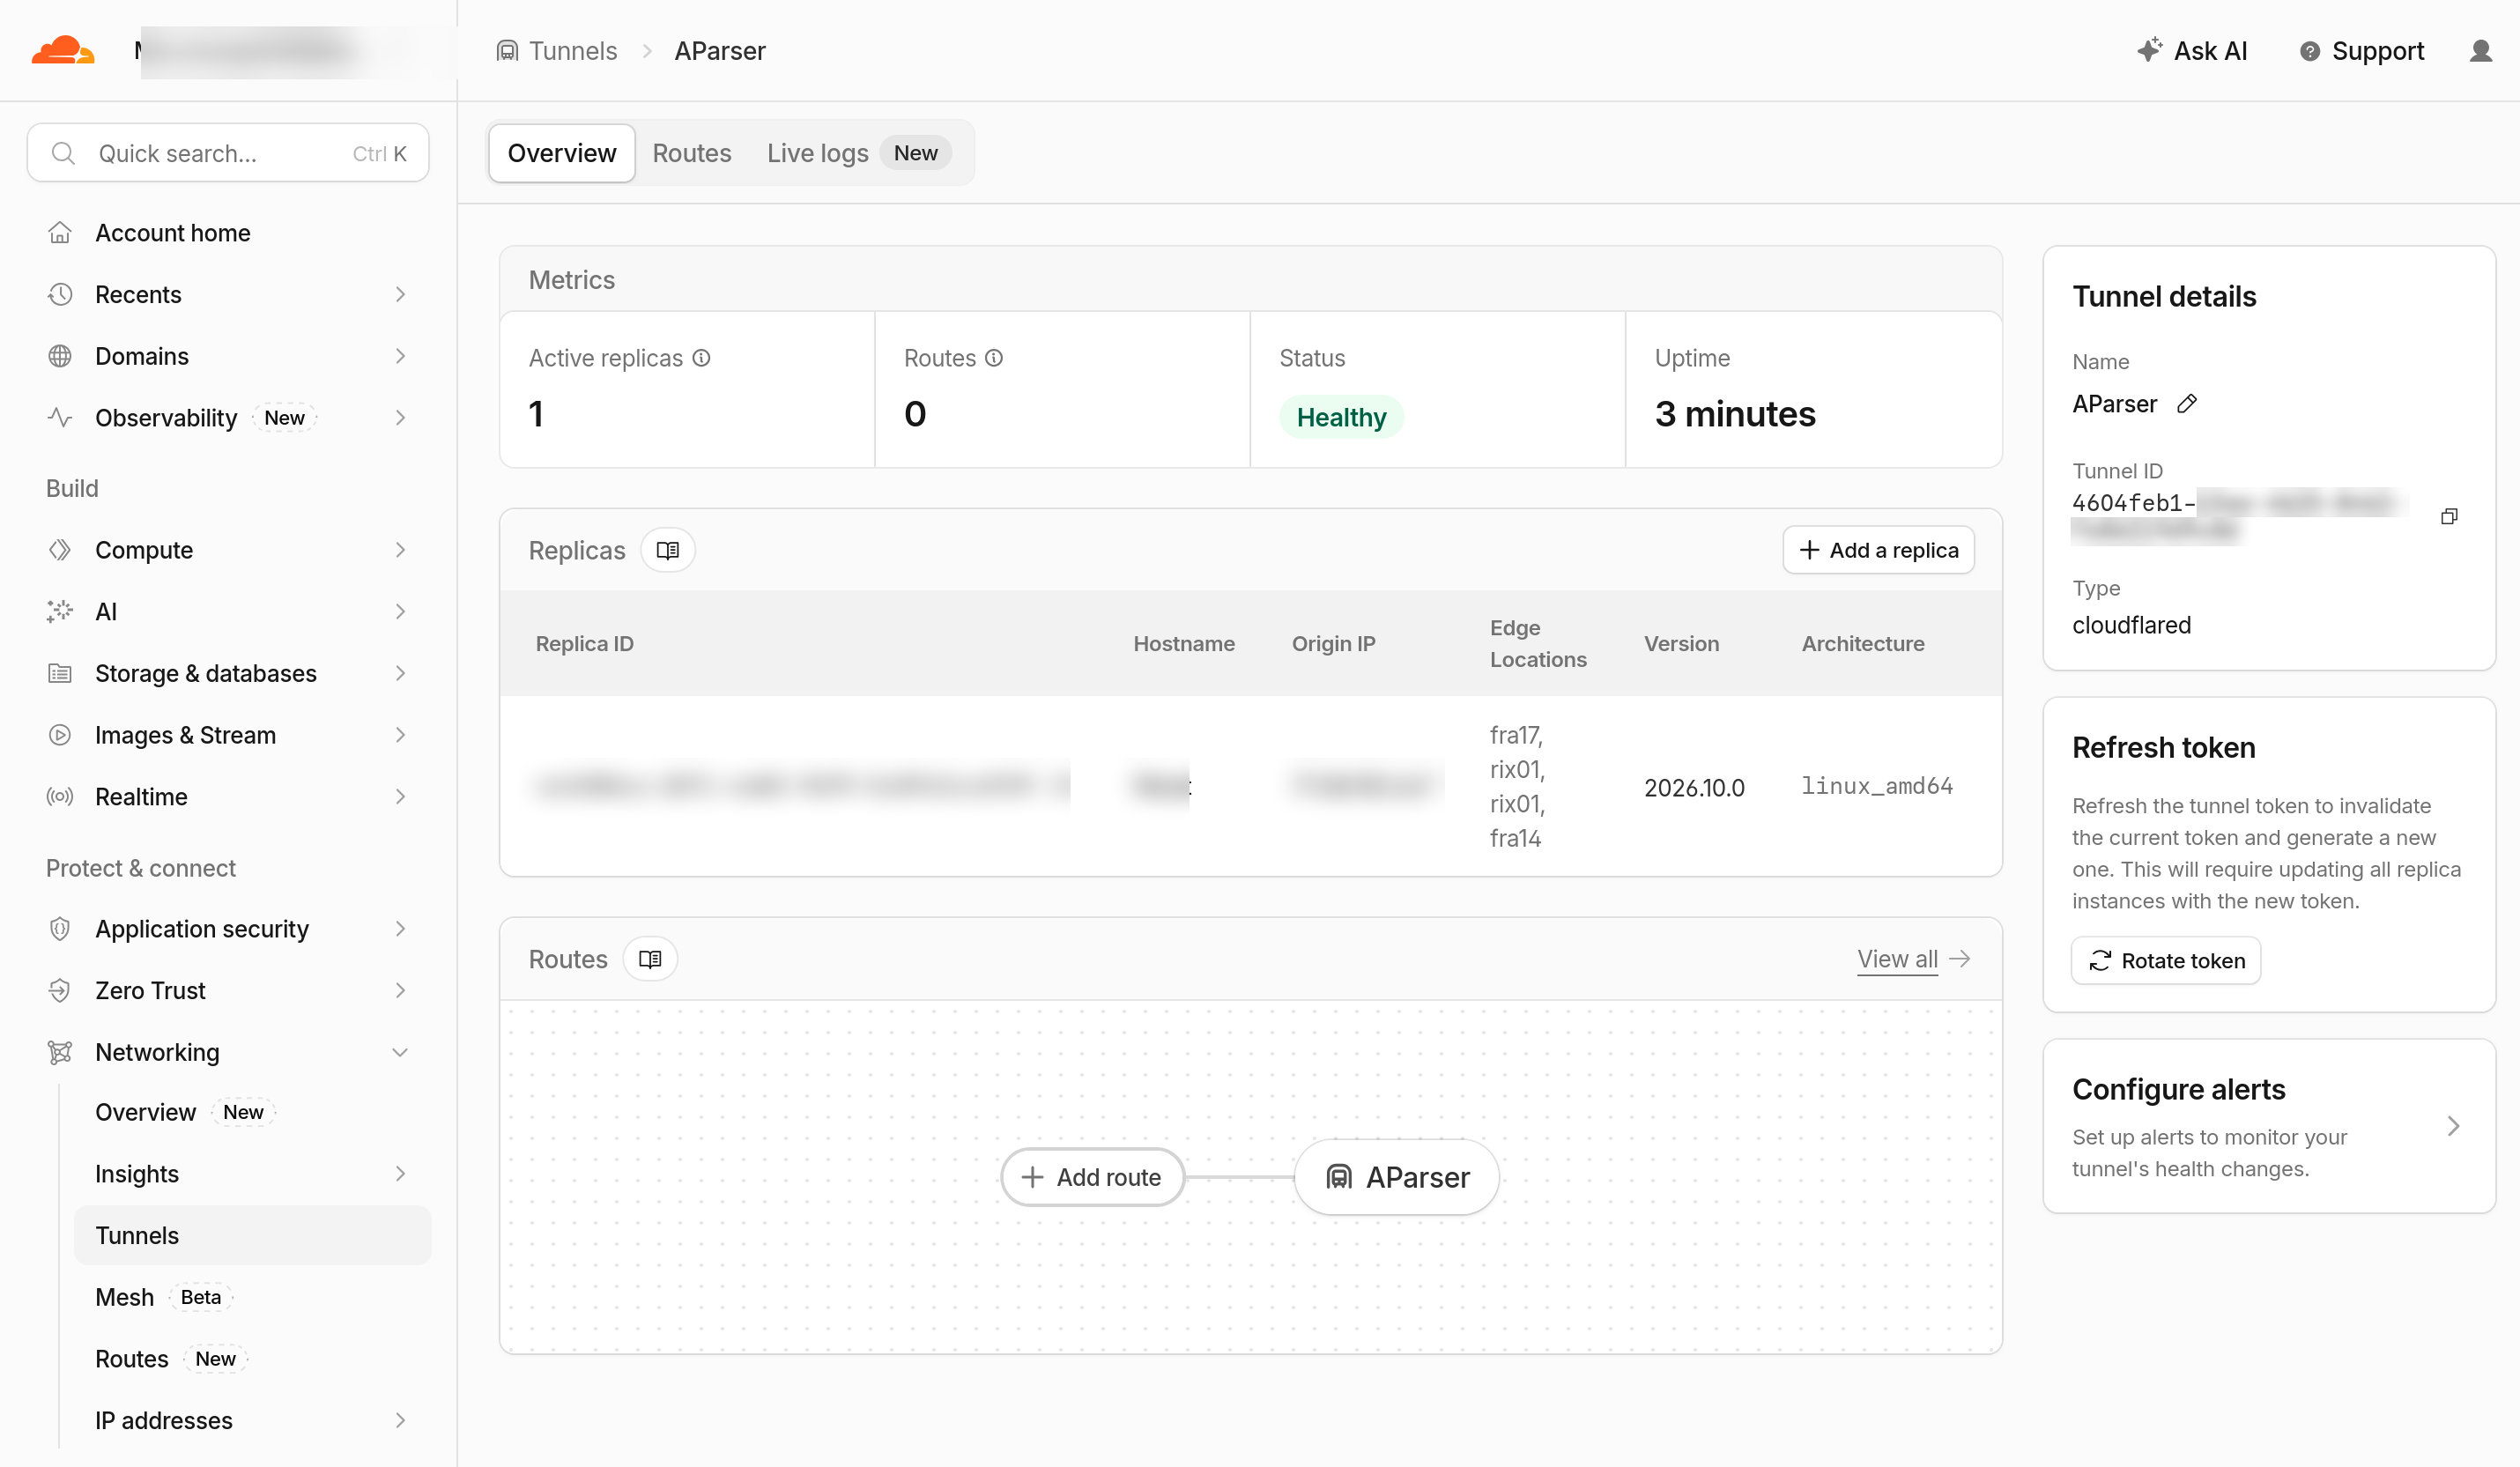
3. In the modal dialog, select route type — Published application (Publish local applications to the Internet via public hostname).
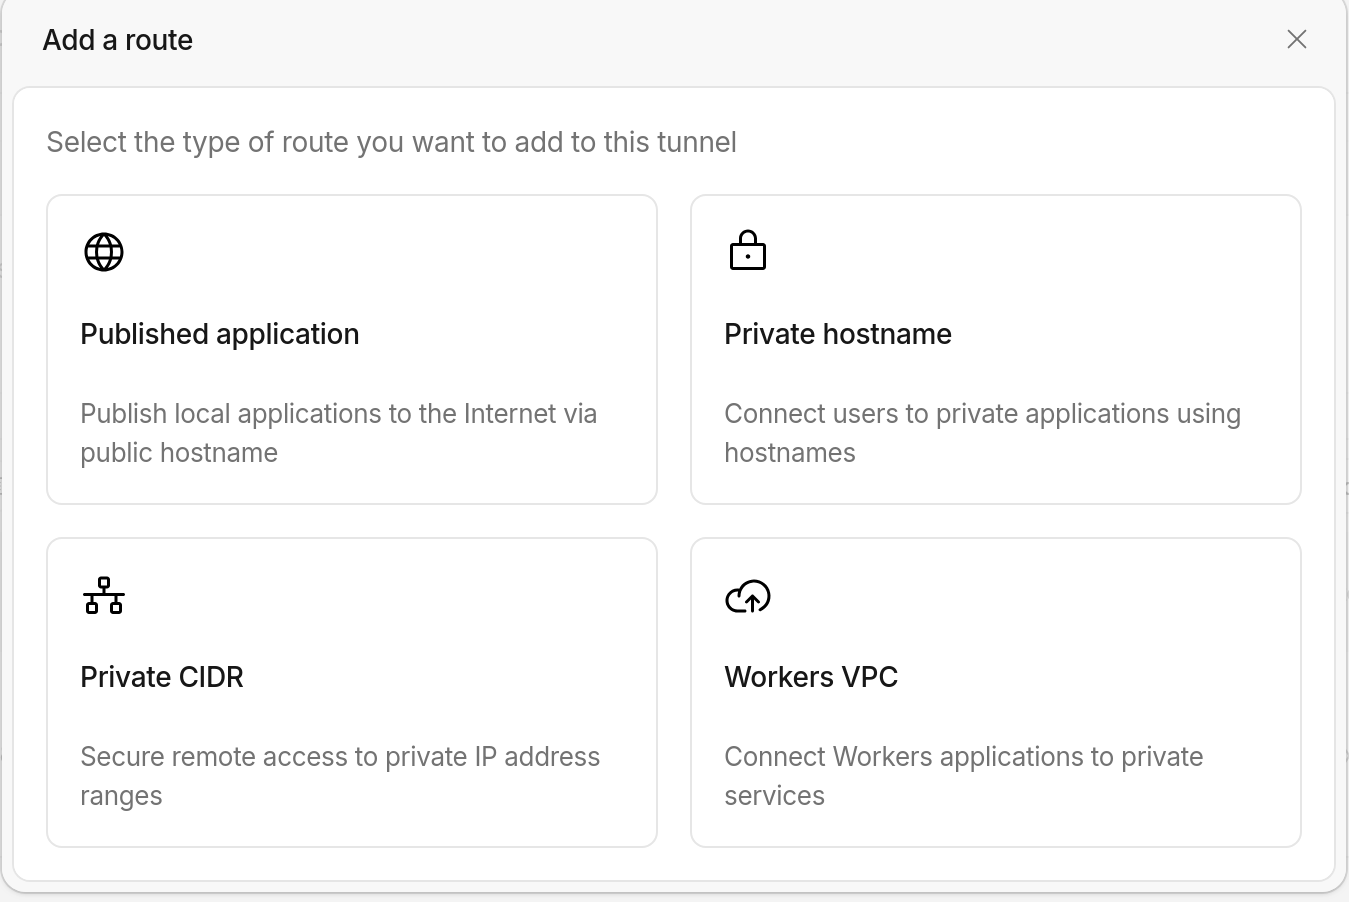
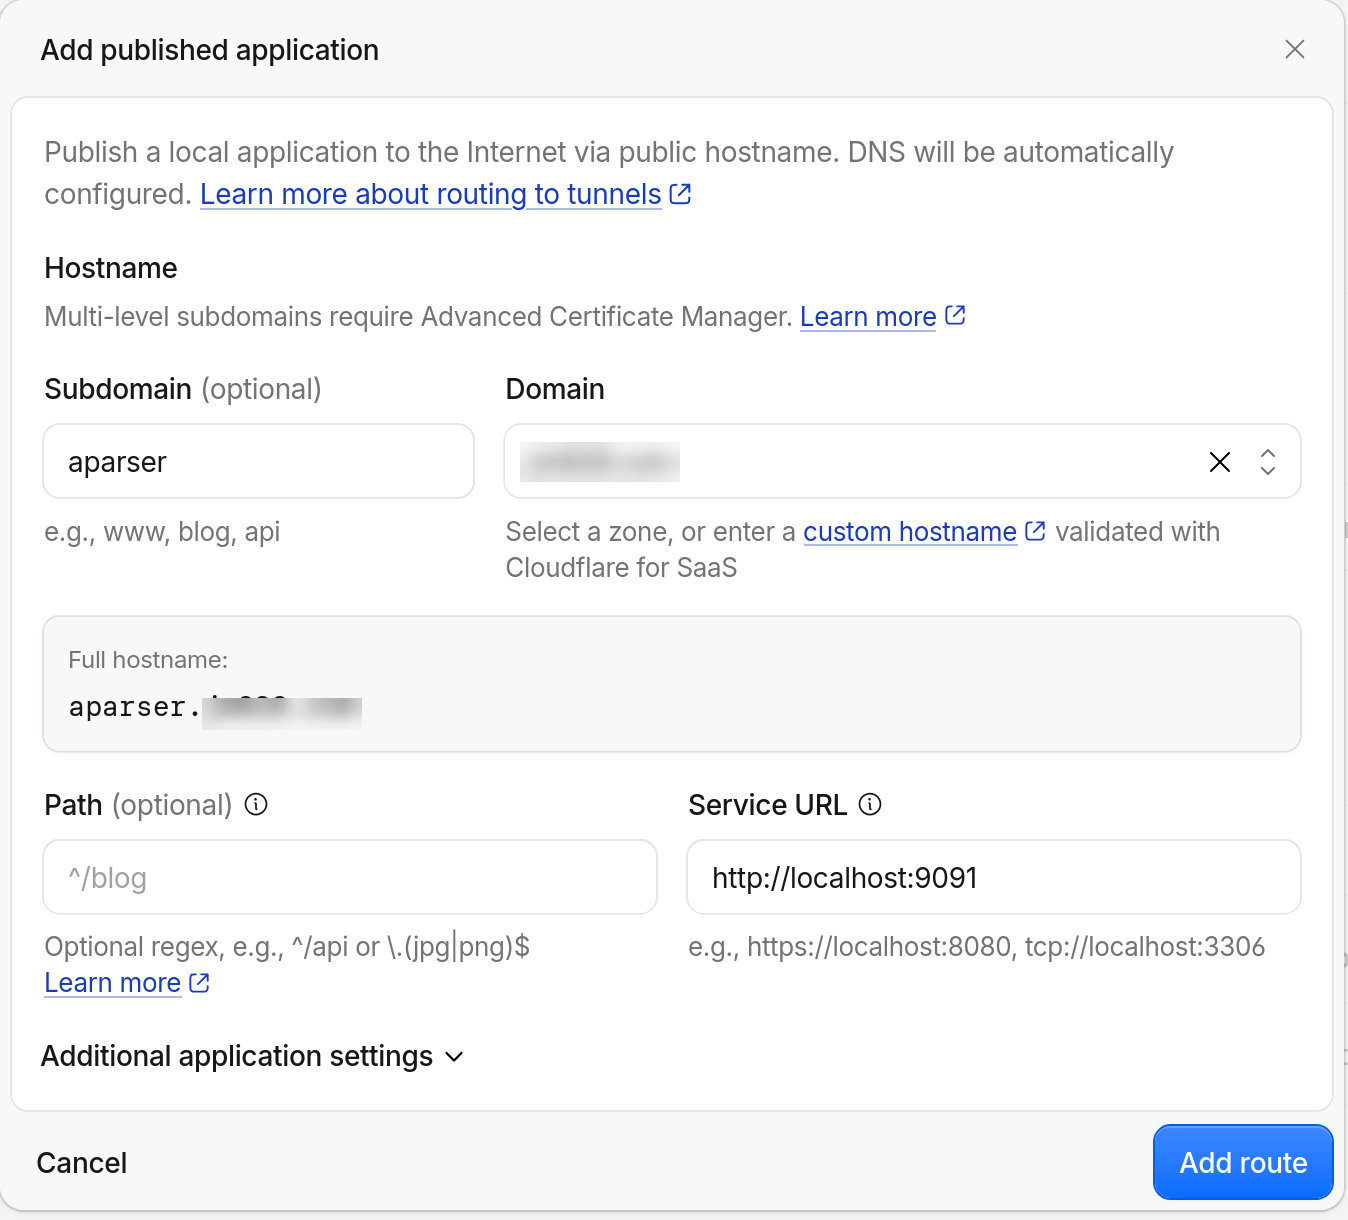
4. Fill in the route parameters:
- Subdomain: enter your preferred subdomain (e.g.,
aparser); - Domain: choose your domain from the dropdown (e.g.,
my-domain.com); - This creates the public URL:
aparser.my-domain.com; - Path: leave empty;
- Service URL: specify the protocol and port of your local A-Parser dashboard:
http://localhost:9091.
5. Click Add route.
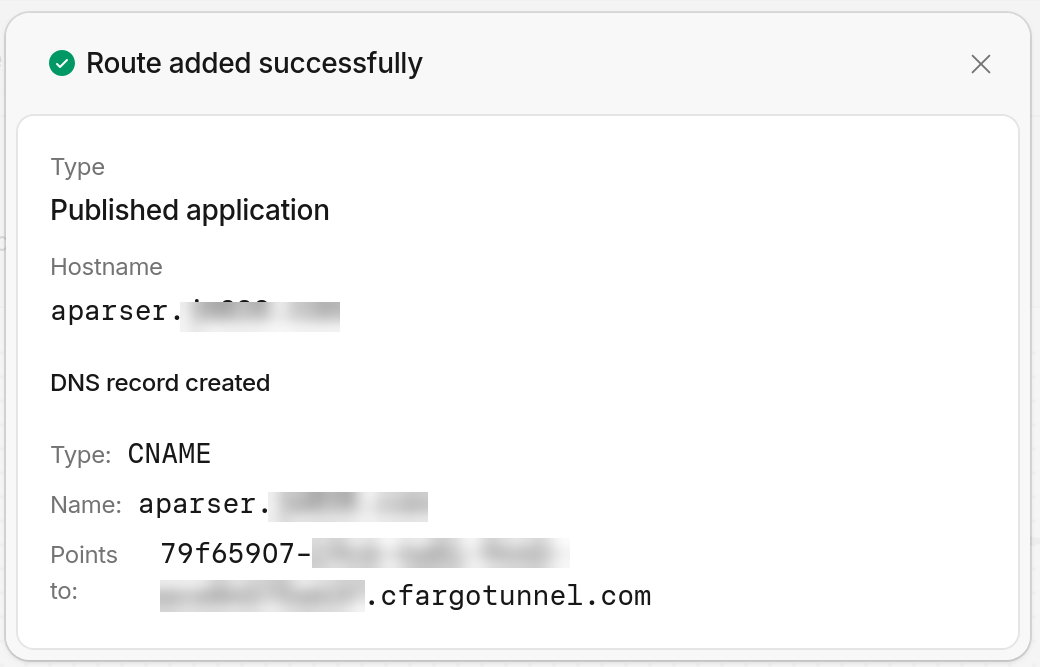
Cloudflare will confirm: ✔ Route added successfully — and automatically provision the required CNAME record in your domain’s DNS zone!
Step 5. Verify Tunnel Status in Dashboard
In the Tunnels dashboard, the connector should appear as Healthy or Active, and the Routes tab should list the public hostname.
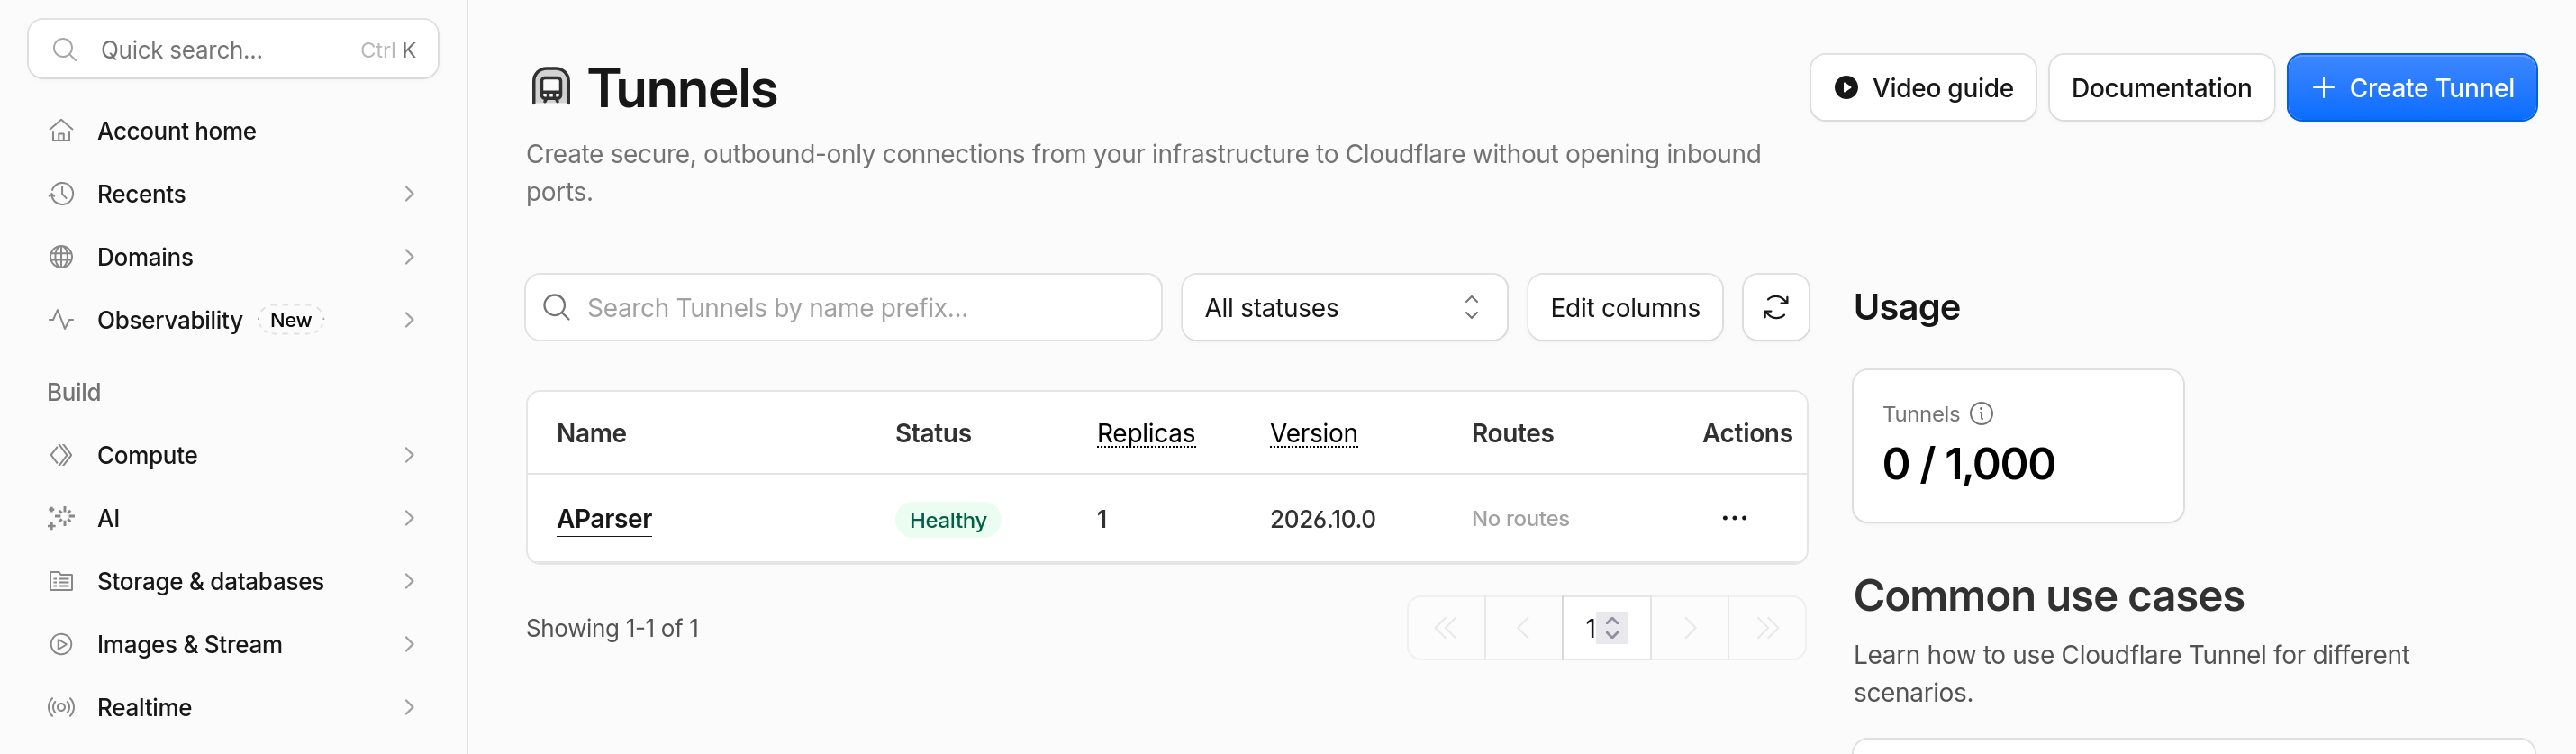
Open https://aparser.my-domain.com in a browser on a PC or smartphone. The A-Parser dashboard should open over HTTPS.
6. Deployment Option B: Docker Compose
Use this option when A-Parser runs in Docker. The A-Parser and cloudflared containers share an internal Docker network.
Step 1. Create the Project Directory and Extract A-Parser
In your user dashboard (A-Parser → Downloads), copy the download link for the aparser-linux-x64.tar.gz archive.
A-Parser documentation for Docker and docker-compose.
For Windows users: Even when running Docker Desktop on Windows, download the Linux distribution (
.tar.gz), because Docker containers run in a Linux environment.
On Linux / macOS:
mkdir -p /opt/aparser-docker && cd /opt/aparser-docker curl -fsSL -O "https://a-parser.com/members/onetime/YOUR_TOKEN/aparser-linux-x64.tar.gz" tar zxf aparser-linux-x64.tar.gz && rm -f aparser-linux-x64.tar.gzOn Windows (PowerShell / File Explorer):
Download the archive into your project directory. In Windows 10/11, extract it in PowerShell with the built-in tar utility, or use 7-Zip:tar -xf aparser-linux-x64.tar.gz
Extraction creates an aparser subdirectory containing the application files.
Step 2. Create docker-compose.yml
Inside the project directory, create a docker-compose.yml file:
services:
  aparser:
    image: aparser/runtime:latest
    container_name: aparser
    command: ./aparser
    restart: always
    volumes:
      - ./aparser:/app
    ports:
      - "127.0.0.1:9091:9091"      # accessible only from the host
    ulimits:
      nofile: { soft: 10240, hard: 10240 }   # Raises the open-file limit for higher concurrency

  cloudflared:
    image: cloudflare/cloudflared:latest
    container_name: cloudflared
    command: tunnel --no-autoupdate run
    restart: always
    environment:
      - TUNNEL_TOKEN=...YOUR_TUNNEL_TOKEN...
    depends_on:
      - aparser
Local Access: The
portssection is needed only when you want to open the dashboard locally from the host without using the tunnel. Thecloudflaredcontainer connects to A-Parser through the internal Docker network athttp://aparser:9091— the container’s internal port, not the host port.If local access is unnecessary, you can omit the
portssection entirely; the tunnel will still work.
Step 3. Launch Containers and Configure the Cloudflare Route
1. Start the containers:
docker compose up -d
2. When configuring the route described in Section 5, Step 4: When adding your route (Routes → Add route → Published application), enter the container’s internal hostname in the Service URL field instead of http://localhost:9091: http://aparser:9091 The cloudflared container forwards requests to this internal Docker hostname and port, without using the host port binding.
7. Optional: Extra Layer of Protection with Cloudflare Access
This step is optional. Cloudflare Access adds another sign-in layer in front of the A-Parser login page.
To add this layer, configure Cloudflare Access for a self-hosted application in the Cloudflare dashboard.
Official Guide for Self-Hosted Applications and Access Policies Documentation.
Step 1. Create an Access Application
1. In the Cloudflare One sidebar, navigate to: Access controls → Applications. 2. Click the Add an application button.
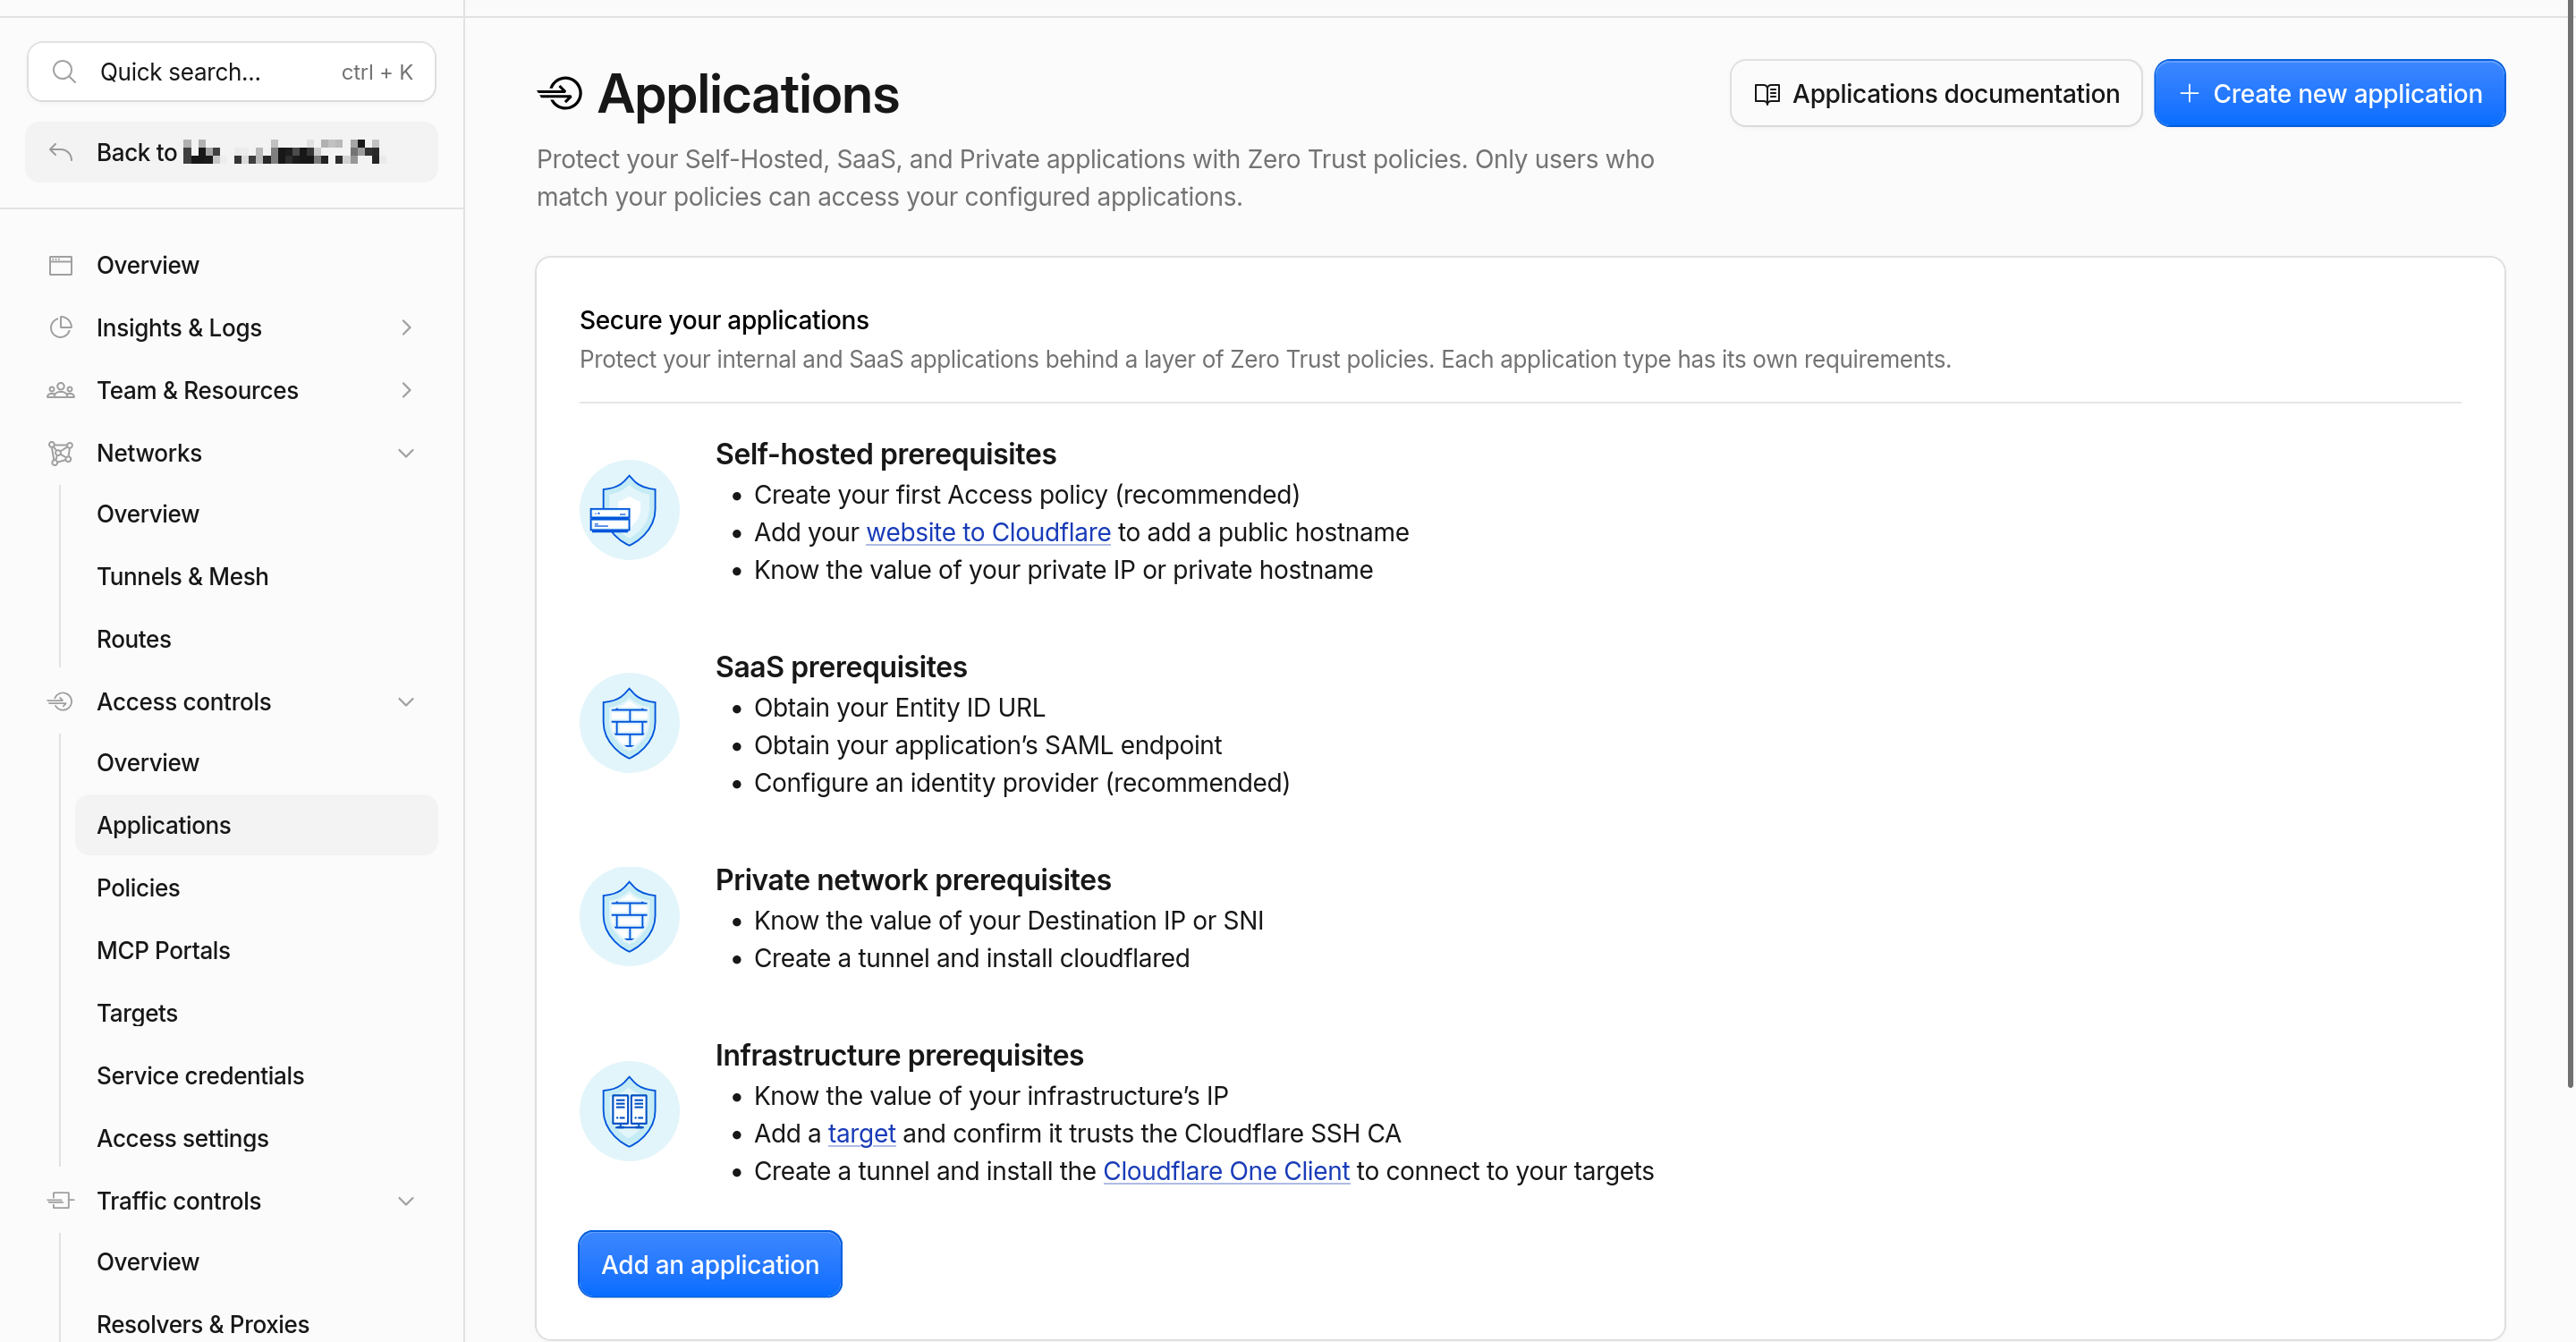
3. Select the Self-hosted and private card (Applications only available for your users) and click Continue with Self-hosted and private.
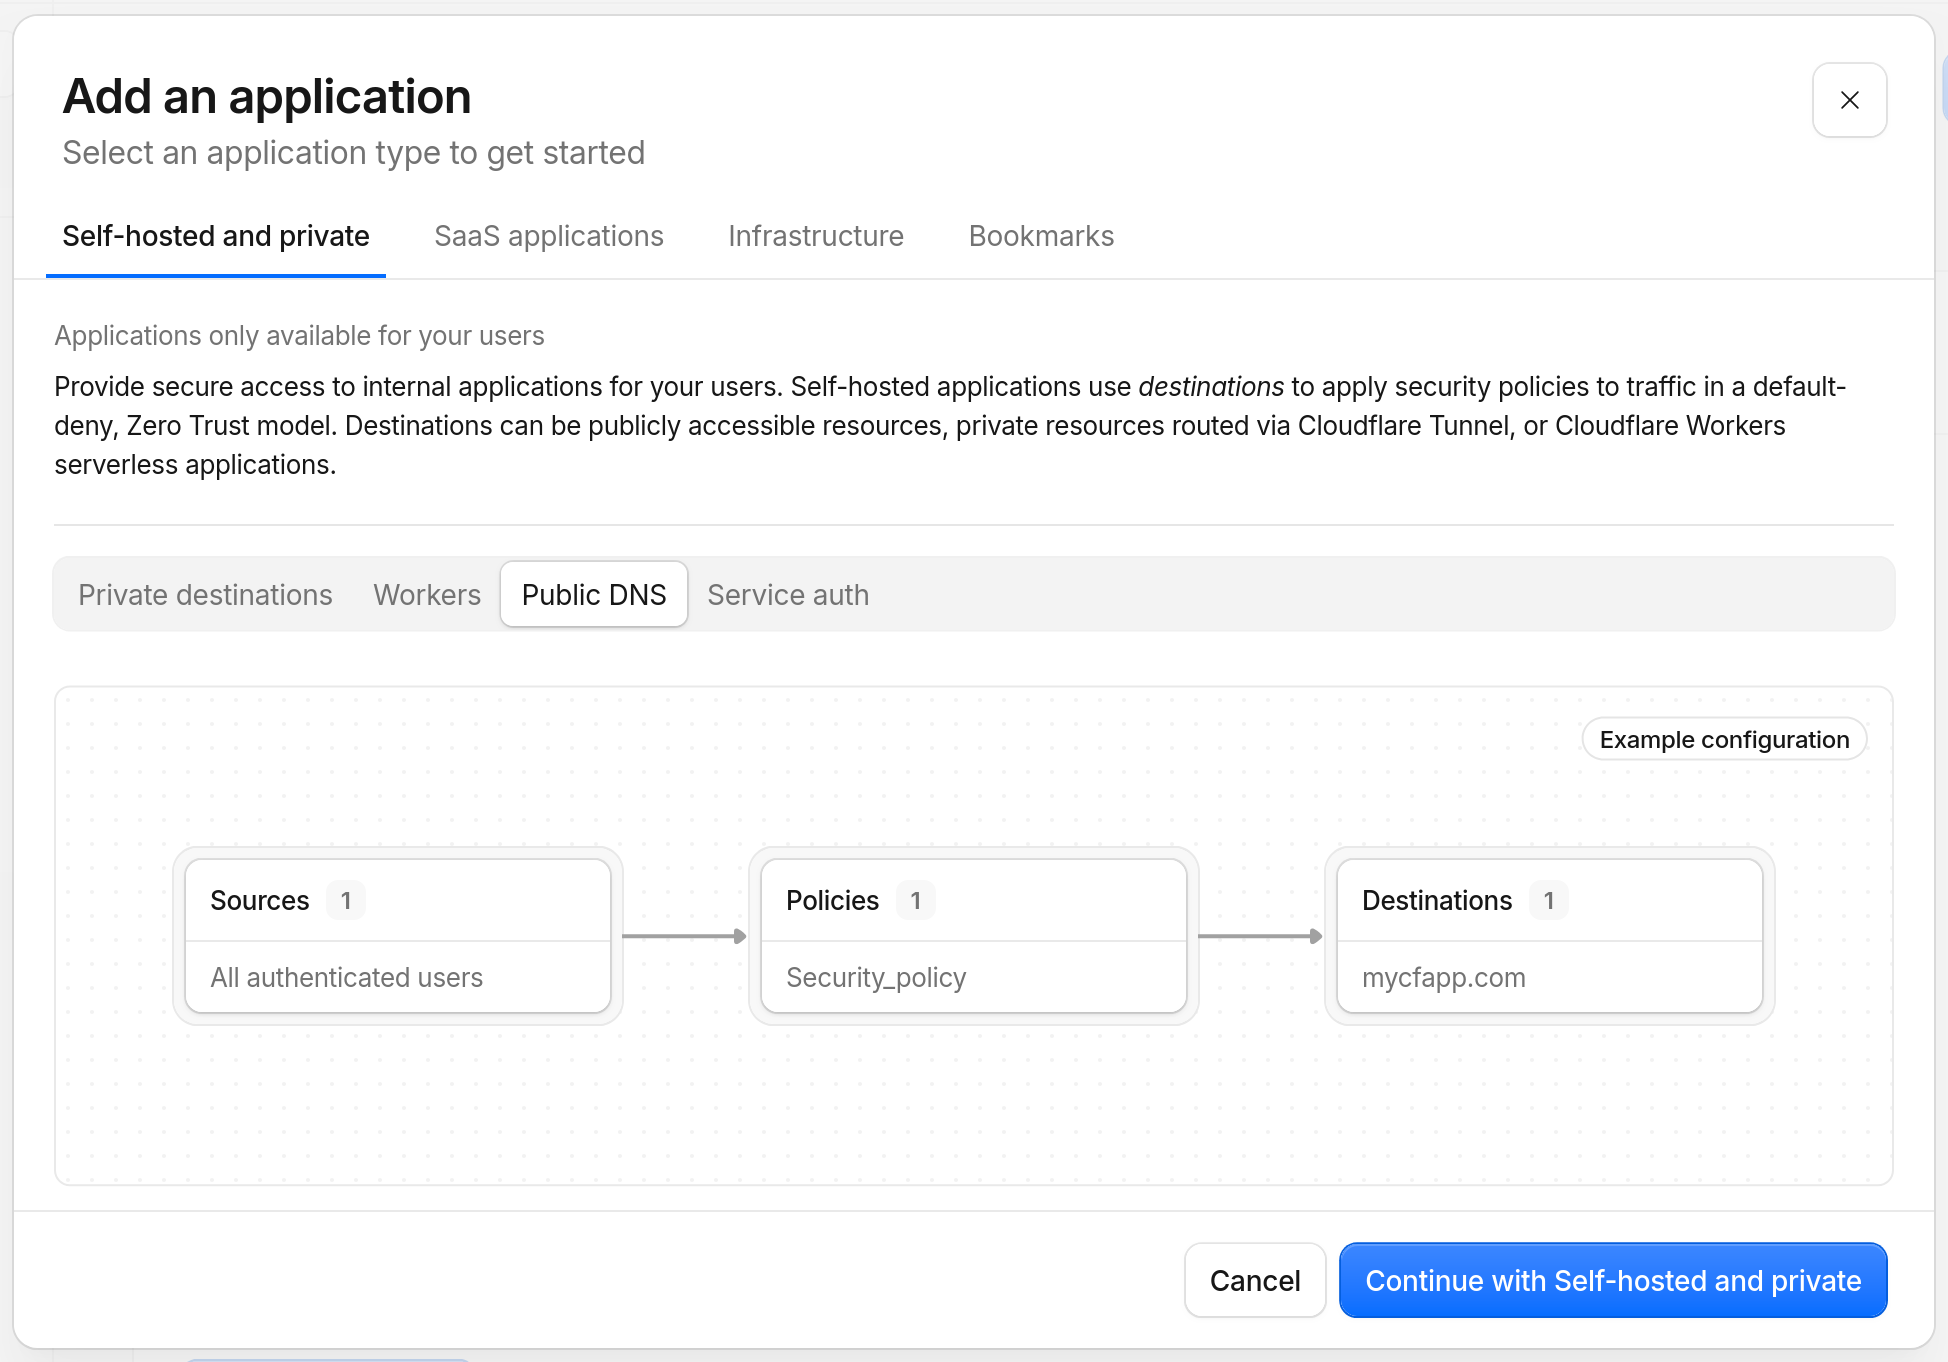
Step 2. Configure the Domain and Session Duration
1. Under Application configuration:
- Application name: enter
aparser; - Session Duration: choose a session duration, such as
24 hours, to avoid signing in too frequently.
2. Under Destinations → Public hostnames:
- Enter the hostname you created:
aparser.my-domain.com.
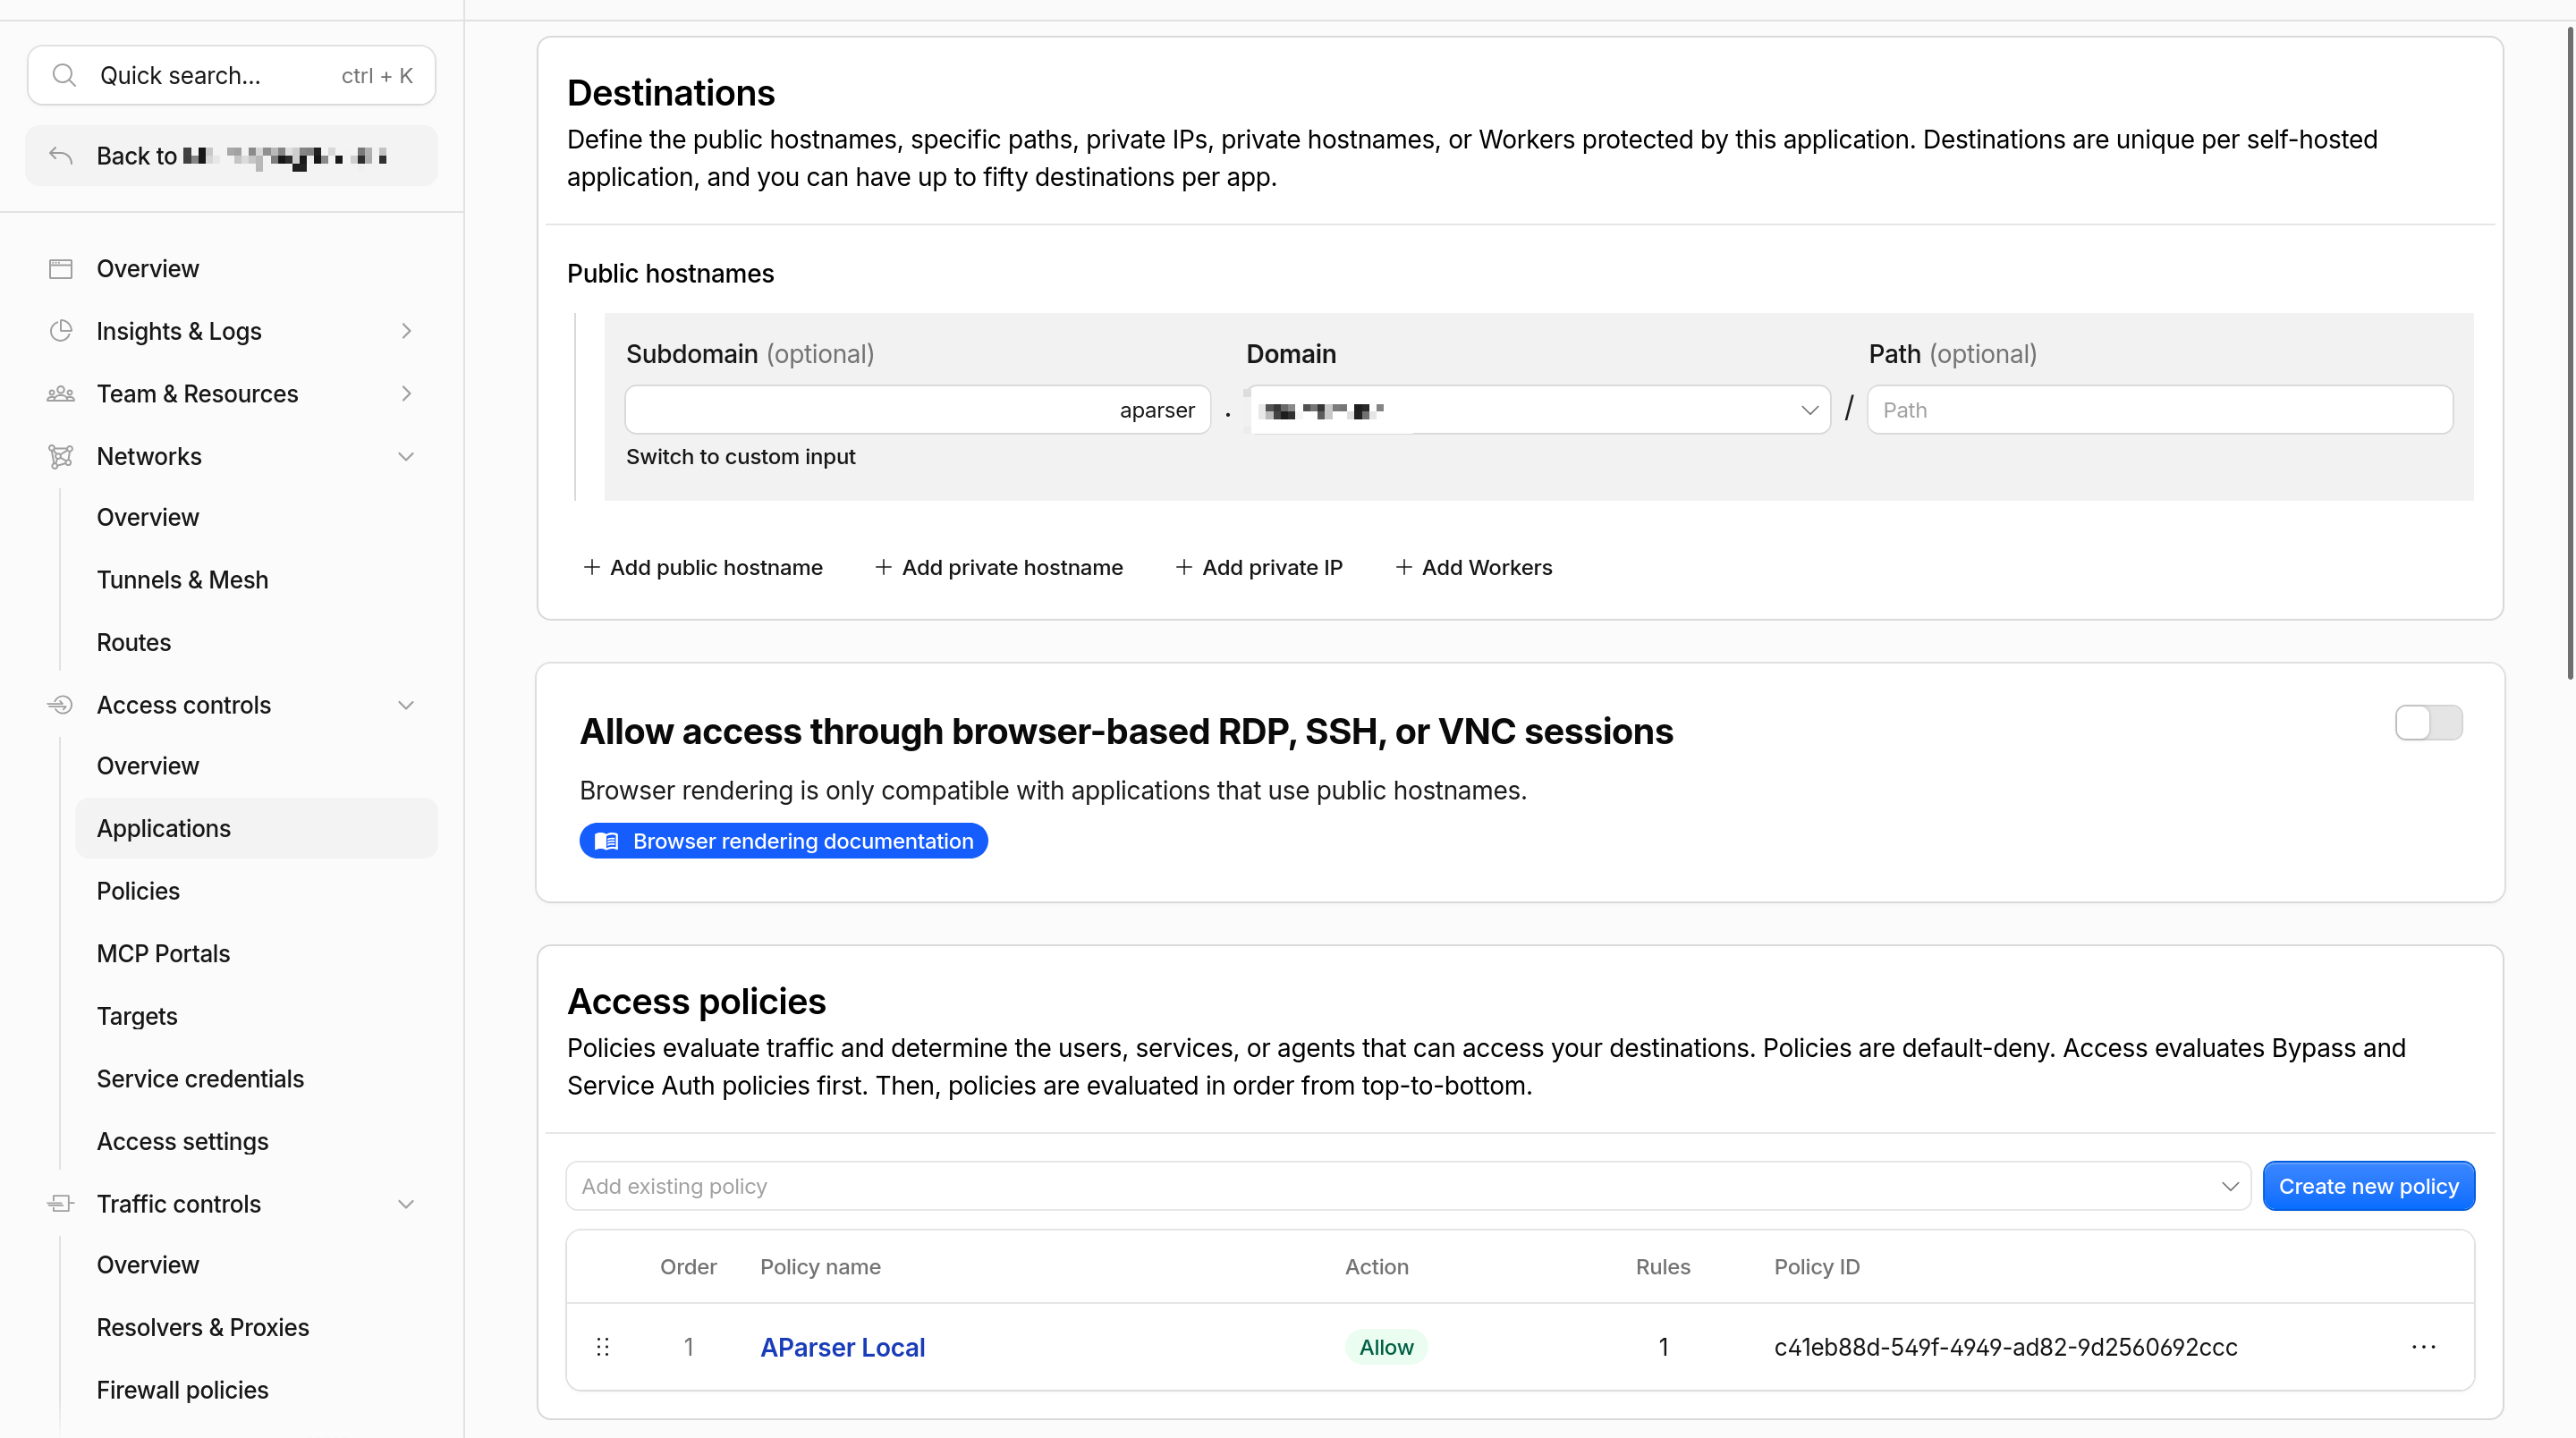
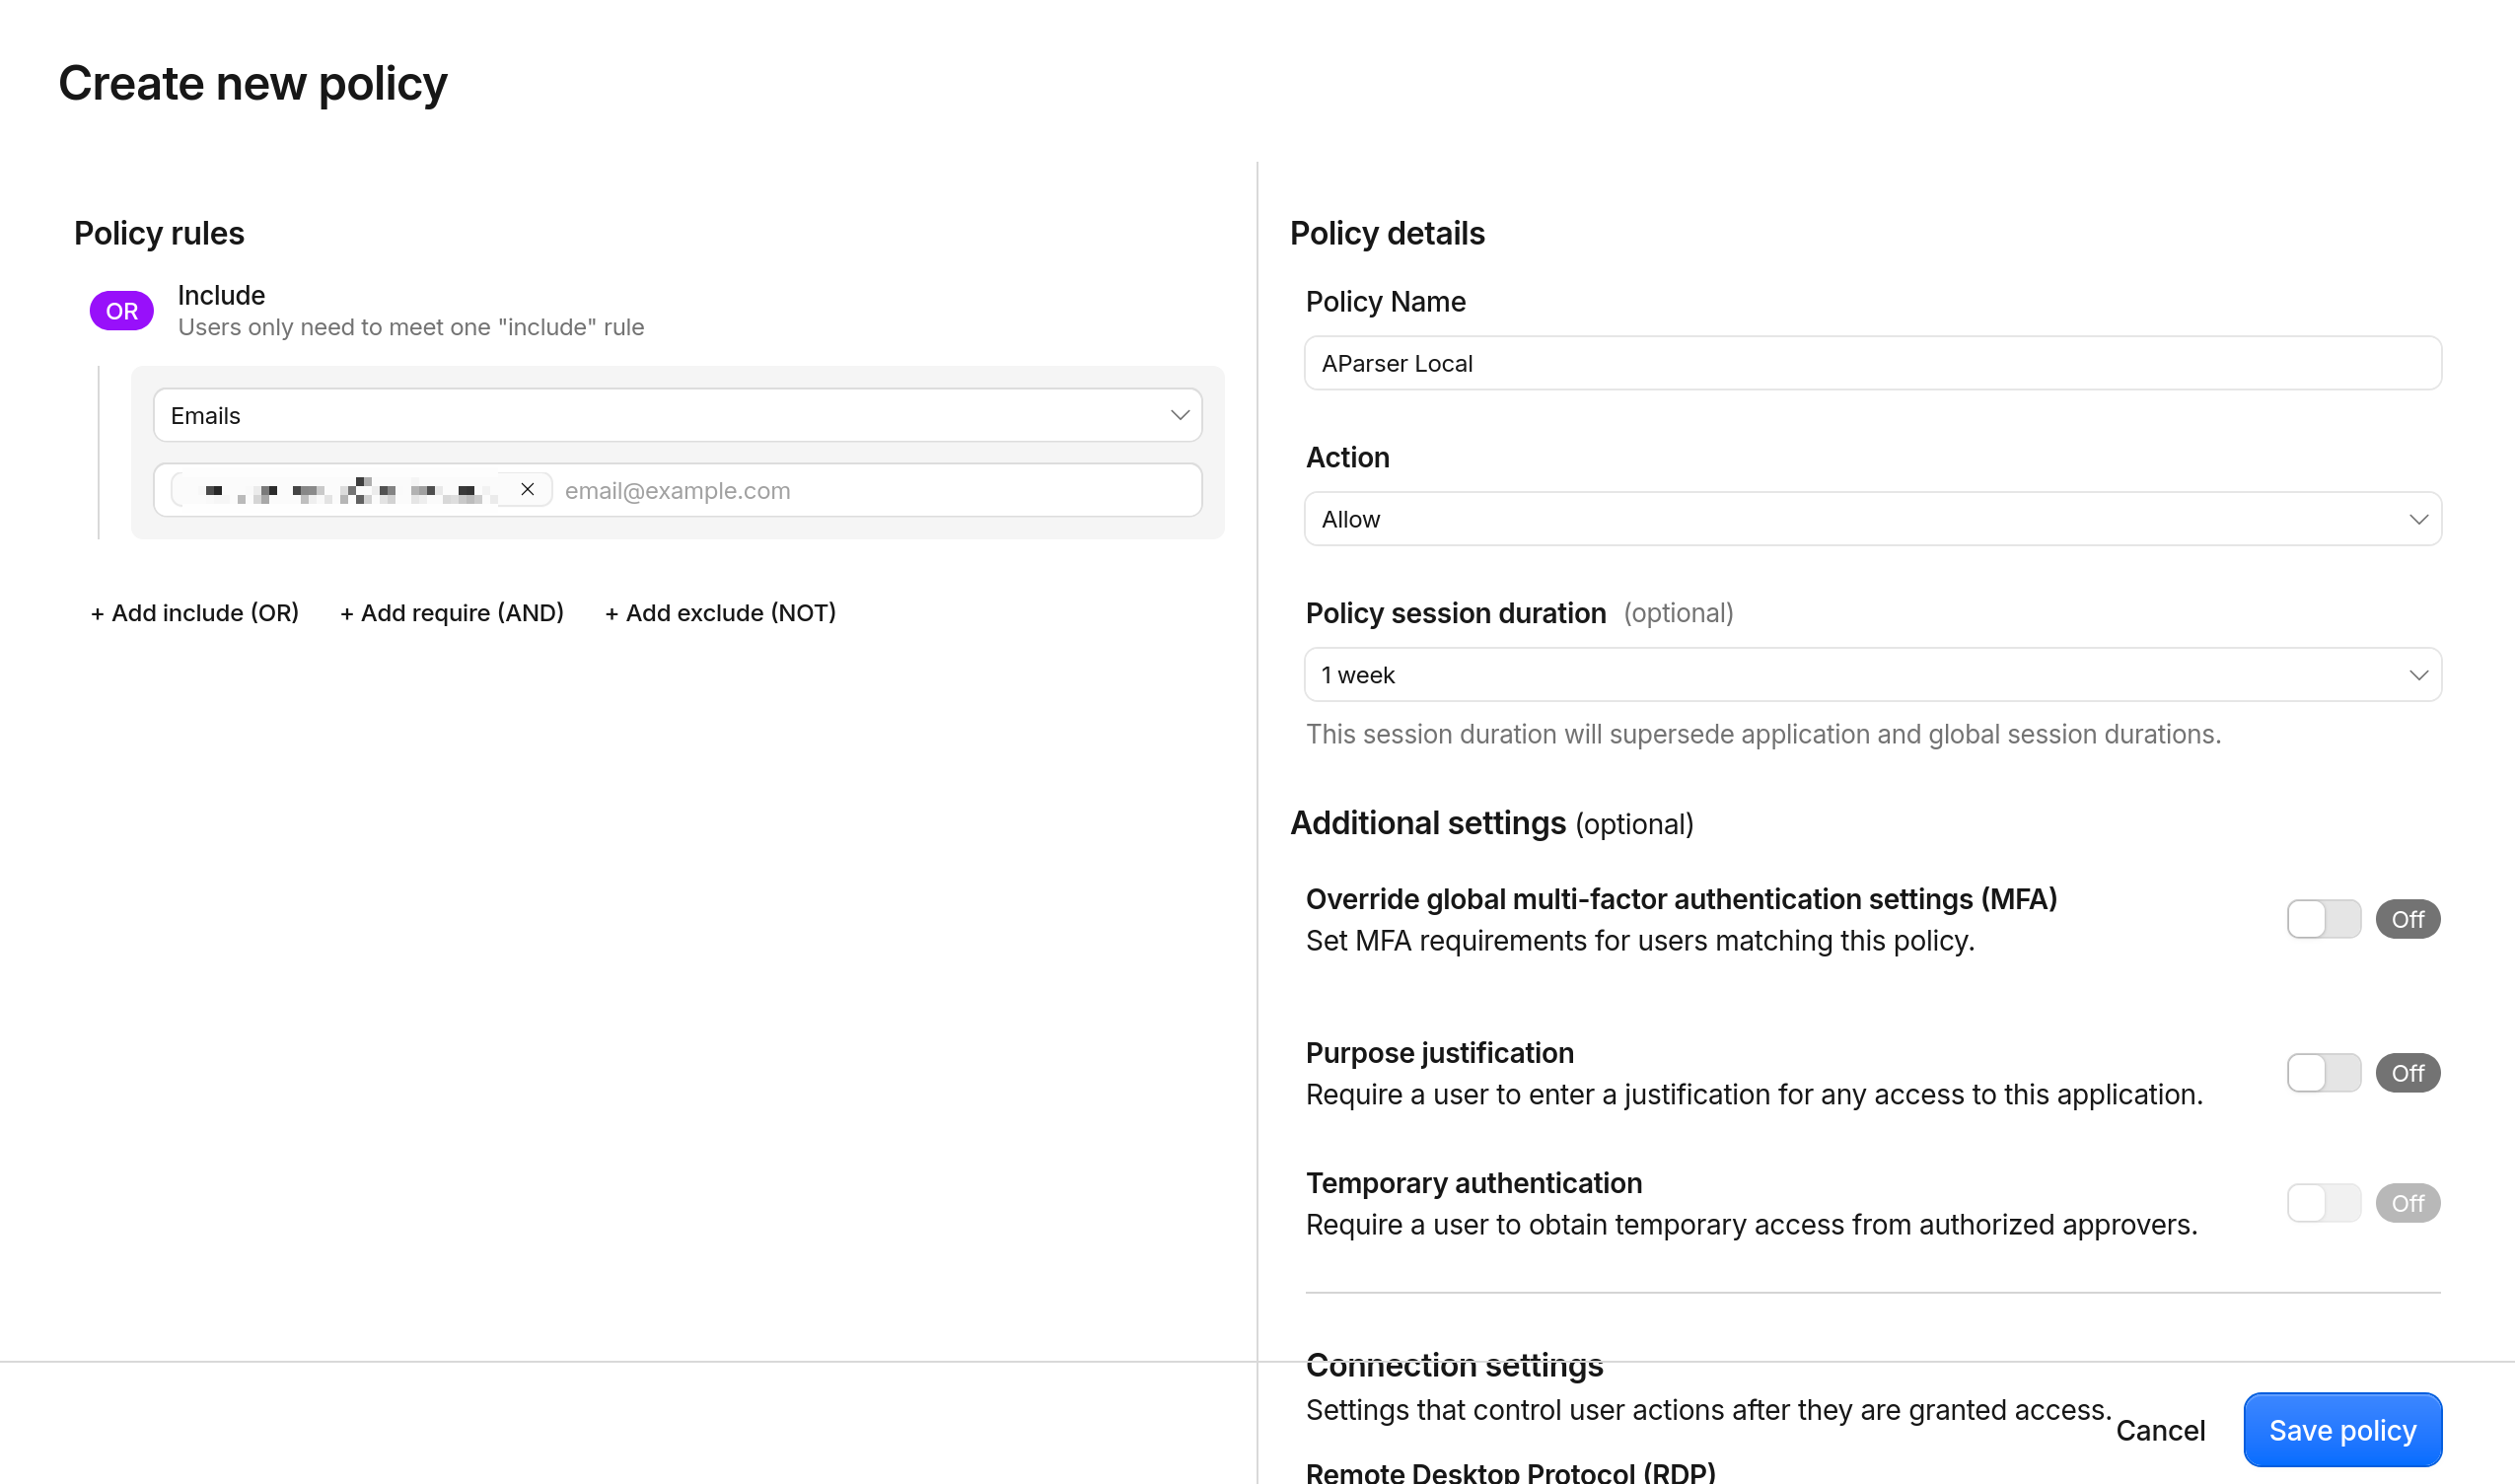
Step 3. Define an Access Policy Rule
1. Proceed to the policy configuration step (Create new policy). 2. Configure the basic parameters:
- Policy name:
Only Me; - Action:
Allow.
3. Under Policy rules → @ Include:
- From the selector dropdown, select: Emails;
- In the value field, enter your personal email address (e.g.,
[email protected]).
4. Click Save application.
What Changes After You Enable Cloudflare Access:
When someone opens https://aparser.my-domain.com, Cloudflare intercepts the request before it reaches A-Parser and displays the Cloudflare Access verification screen:
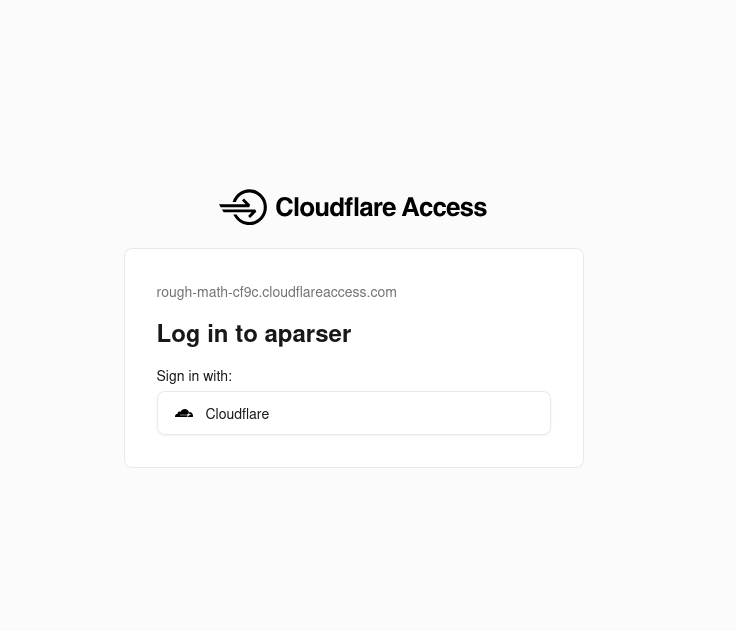
Sign in with your Cloudflare account using your password or a one-time code, and you are taken straight to the A-Parser dashboard. Everyone else — including bots and automated scanners — is stopped at Cloudflare’s edge before they can even see the A-Parser login page.
8. FAQ: Frequently Asked Questions and Security
1. Could Cloudflare block the tunnel due to high scraping traffic?
In this setup, scraping traffic does not pass through Cloudflare Tunnel. The tunnel carries dashboard traffic such as interface actions, task configuration, and log updates. A-Parser sends requests to target sites through the local network and configured proxies; that traffic does not traverse the tunnel.
2. Will graphs and logs update in real time?
Yes. The A-Parser dashboard streams real-time events over WebSockets. Cloudflare supports WebSockets by default, so these updates can work through the tunnel.
3. Can I query the A-Parser API from external scripts?
Yes. If you enable Cloudflare Access, requests to POST /api must pass Access validation before reaching A-Parser. For automated scripts, create a service token in Cloudflare One under Service Auth → Service Tokens and attach the CF-Access-Client-Id and CF-Access-Client-Secret headers to each HTTP request.
9. Alternative If You Do Not Have a Domain: Setting Up Ngrok
What if you do not have a domain to delegate to Cloudflare, or prefer not to do so?
Ngrok is an alternative that does not require your own domain.
Why Use Ngrok:
- No Credit Card Required: Registration is free through Google, GitHub, or email, with no payment details requested.
- No Custom Domain Required: On the free tier, Ngrok provides an automatically assigned dev domain (e.g., in the
.ngrok-free.appzone) linked to your account. - Quick Setup: After installing the agent and adding the authtoken, create an endpoint for port
9091.
Key Free Tier Limits for Ngrok:
1 GB outbound data transfer per month;
20,000 HTTP requests and 5,000 TCP connections per month;
Up to 3 simultaneous active endpoints, 3 agents, 1 user, and 1 dev domain per account;
Free tier endpoints operate without idle timeouts;
Step 1. Create a Free Account
1. Visit the official website at ngrok.com and click Sign up. 2. Register using Google, GitHub, or an email address and password. 3. Payment details are not required.
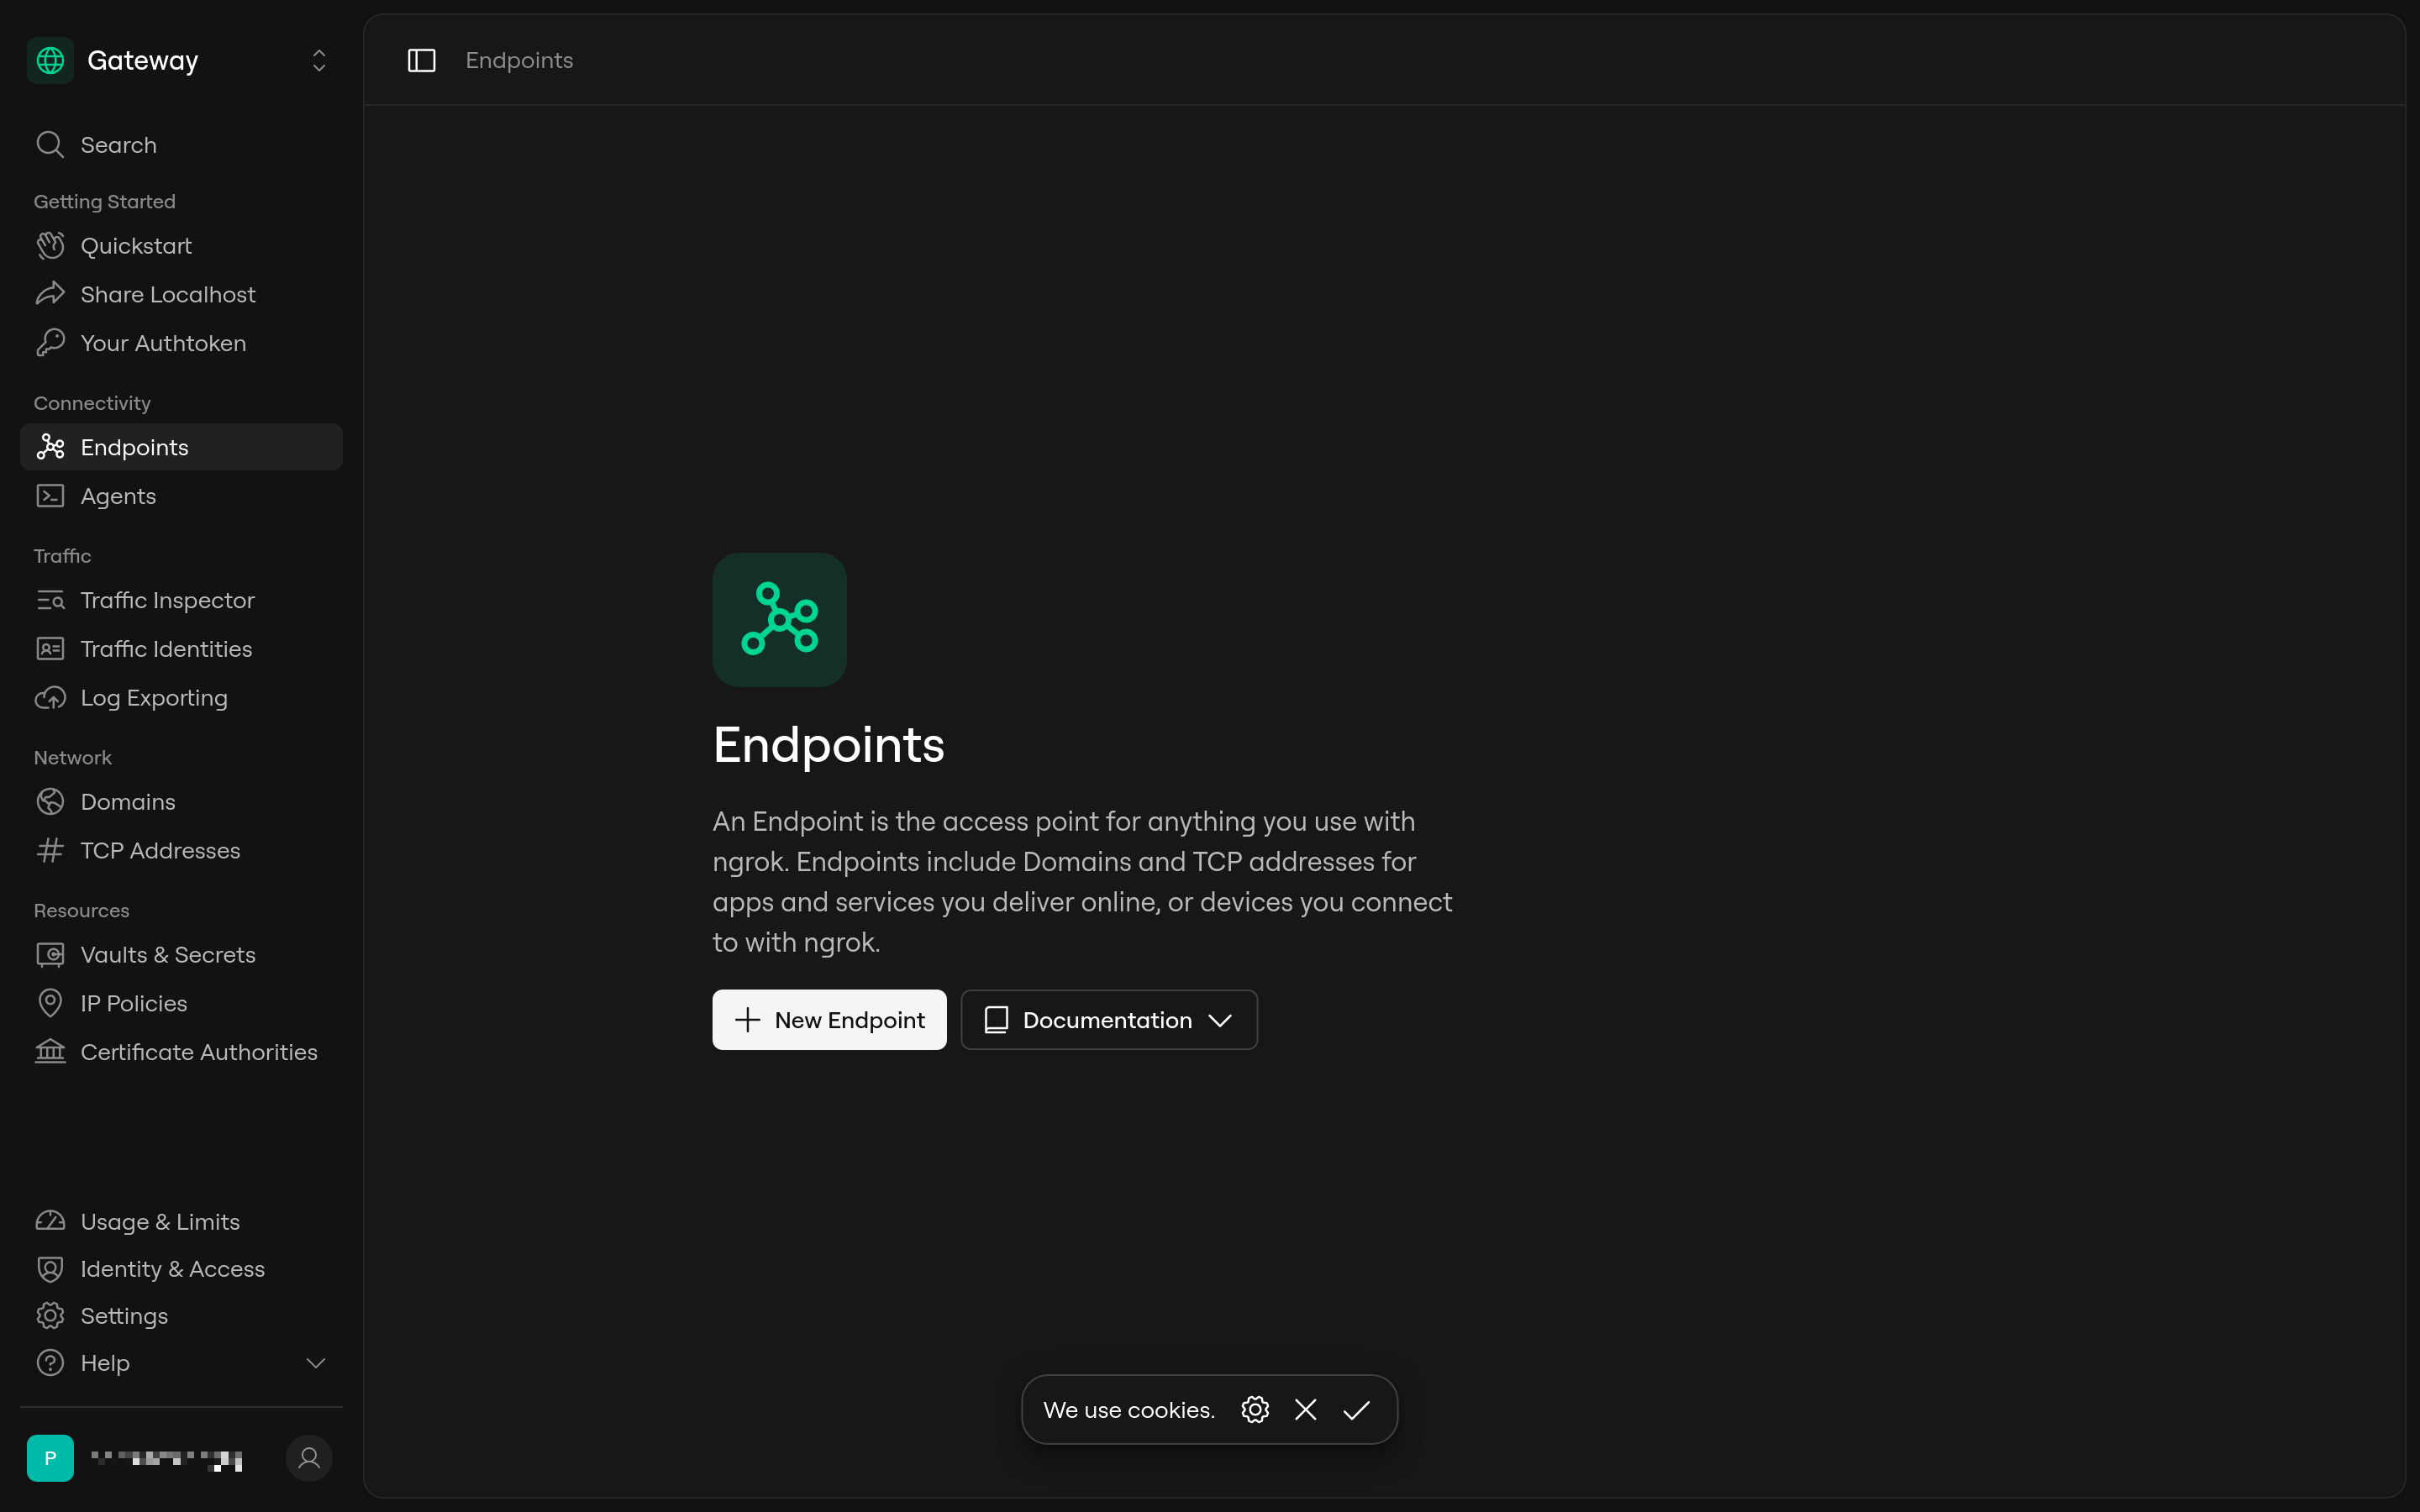
Step 2. Create an Endpoint in the Dashboard
1. In the left navigation menu, go to: Connectivity → Endpoints. 2. Click the New Endpoint button (or the blue + icon).
Step 3. Select Your Platform and Authenticate the Agent
In the setup wizard:
1. Click Change platform and select your operating system (e.g., Windows, macOS, or Linux).
2. Choose an installation method. On Windows, you can use winget, scoop, or download the archive directly.
3. Copy the authtoken command (click Show authtoken to display your token in plain text):
ngrok config add-authtoken YOUR_TOKEN
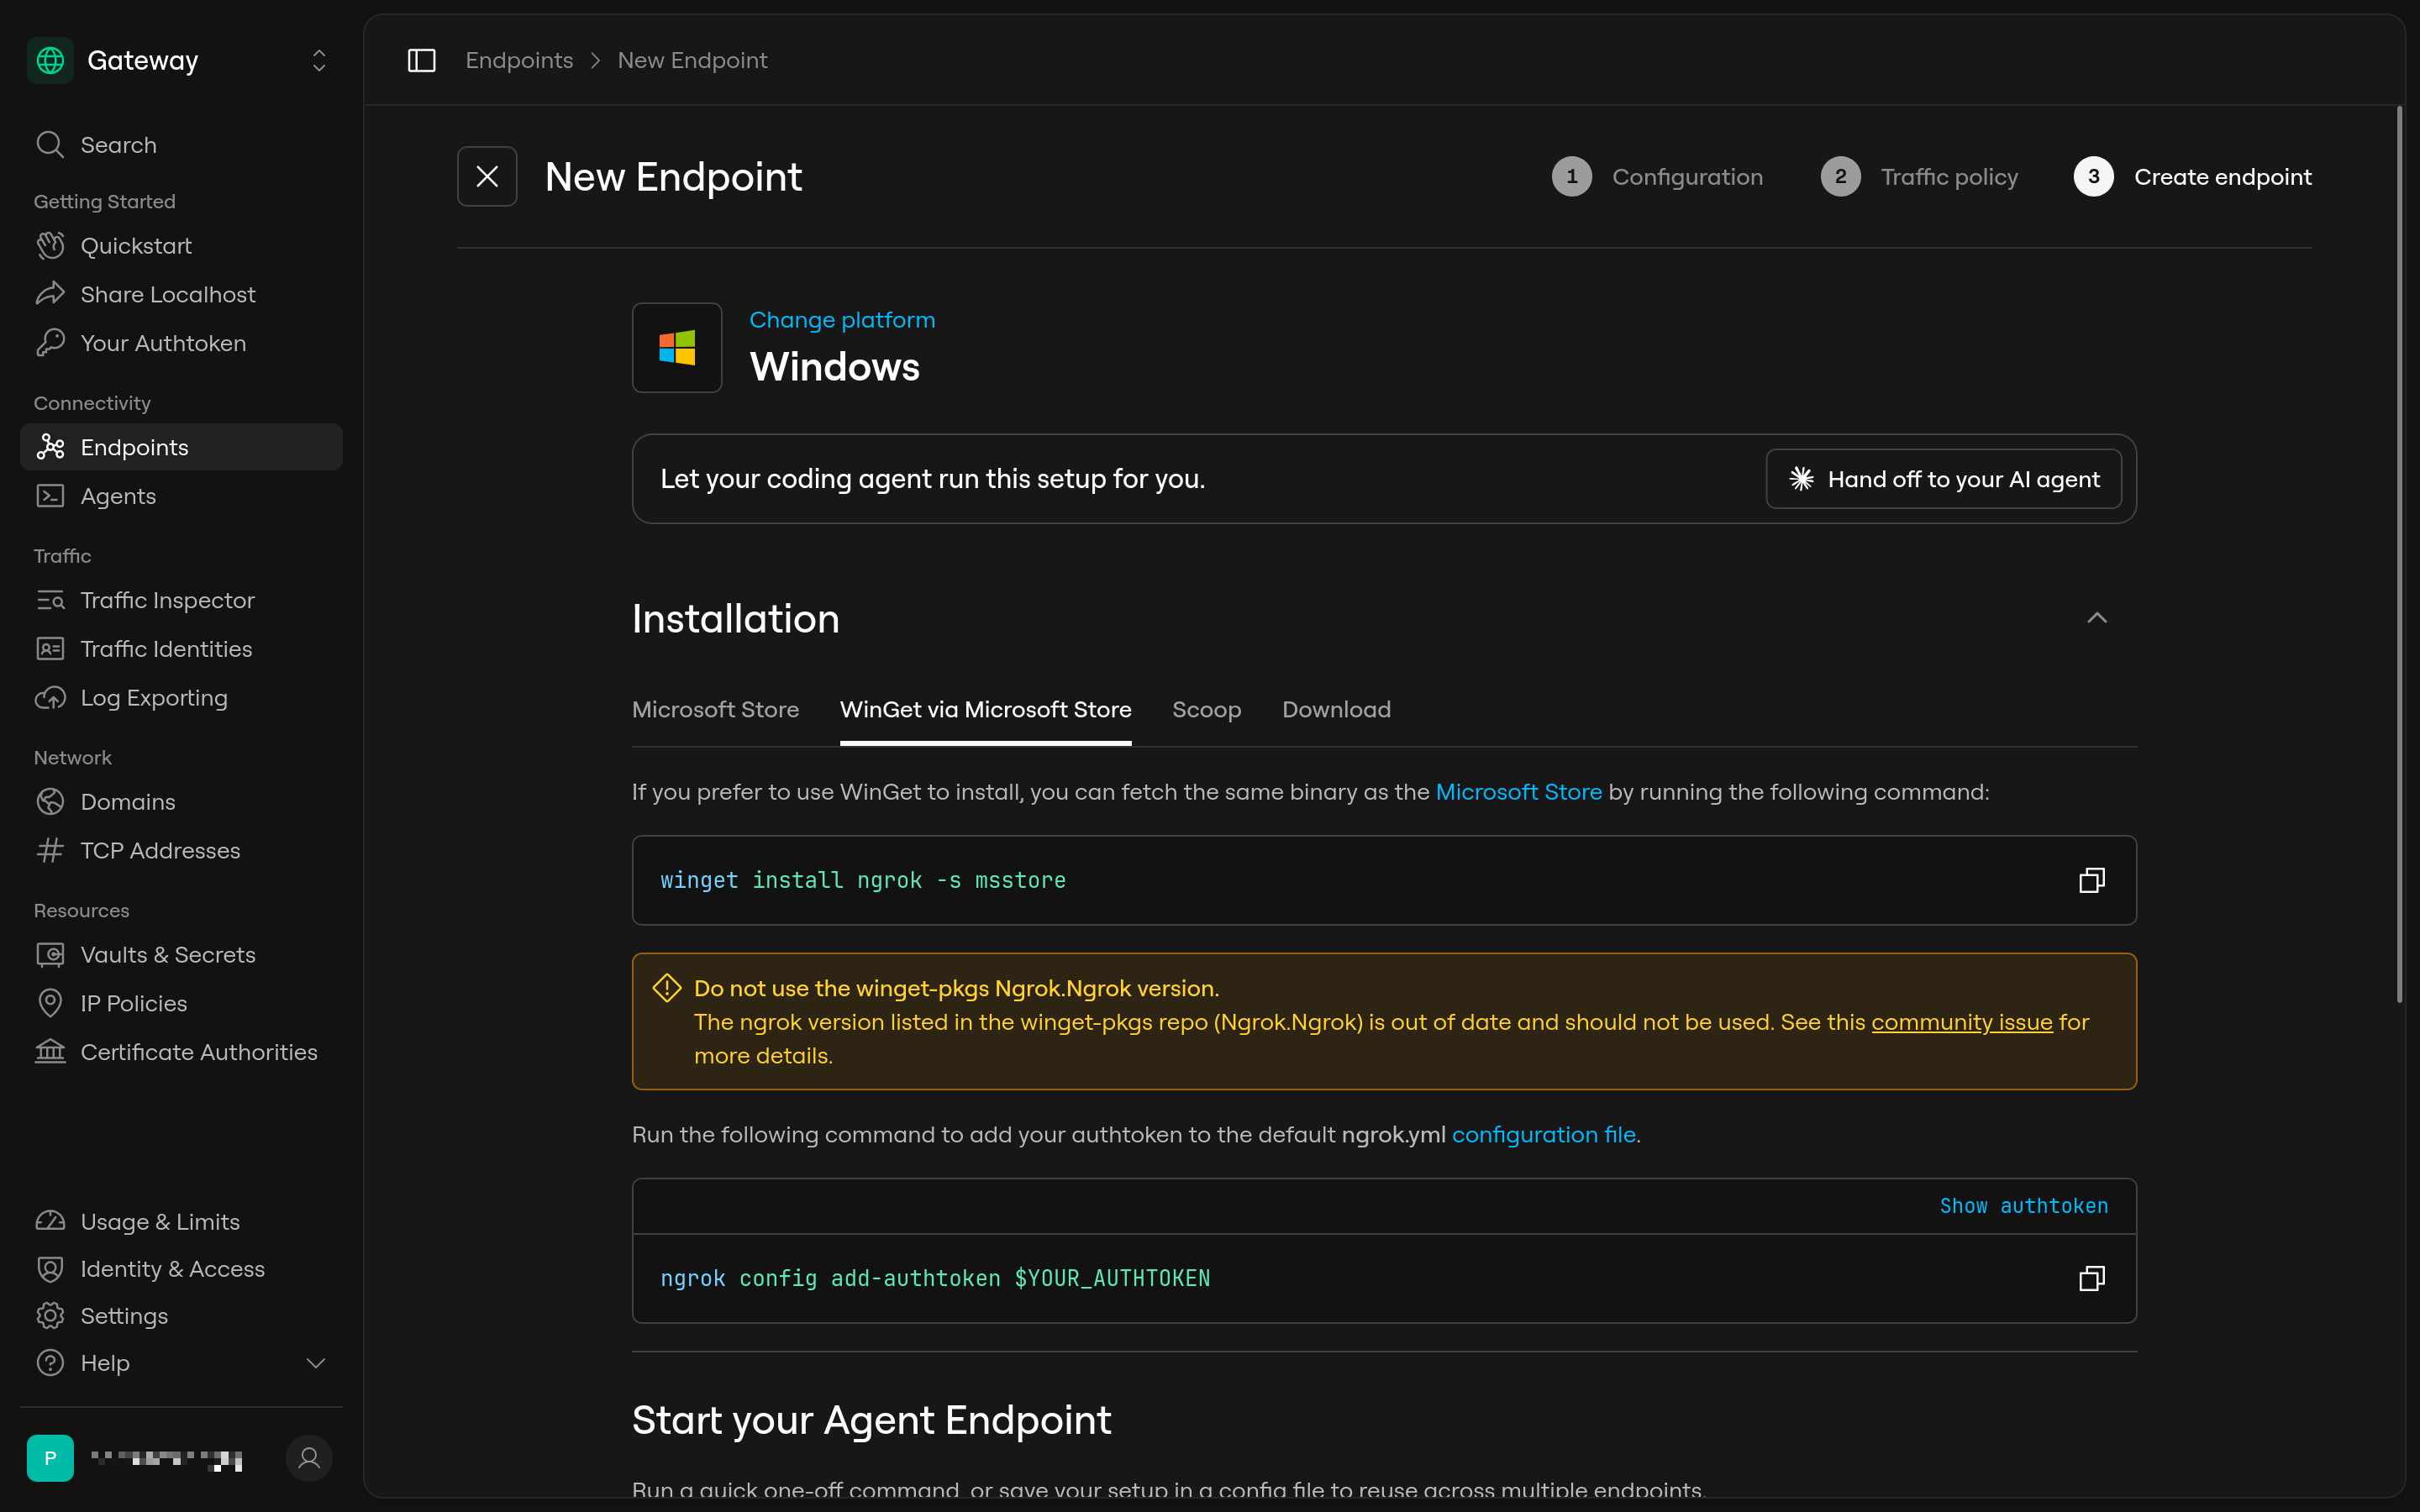
4. Open Command Prompt or terminal on your A-Parser machine and run the command. The configuration will be saved automatically.
Step 4. Start a Tunnel to A-Parser
In your terminal, forward port 9091:
ngrok http 9091
Step 5. Open the Public URL
After the agent starts, the endpoint appears in the Ngrok Endpoints dashboard:
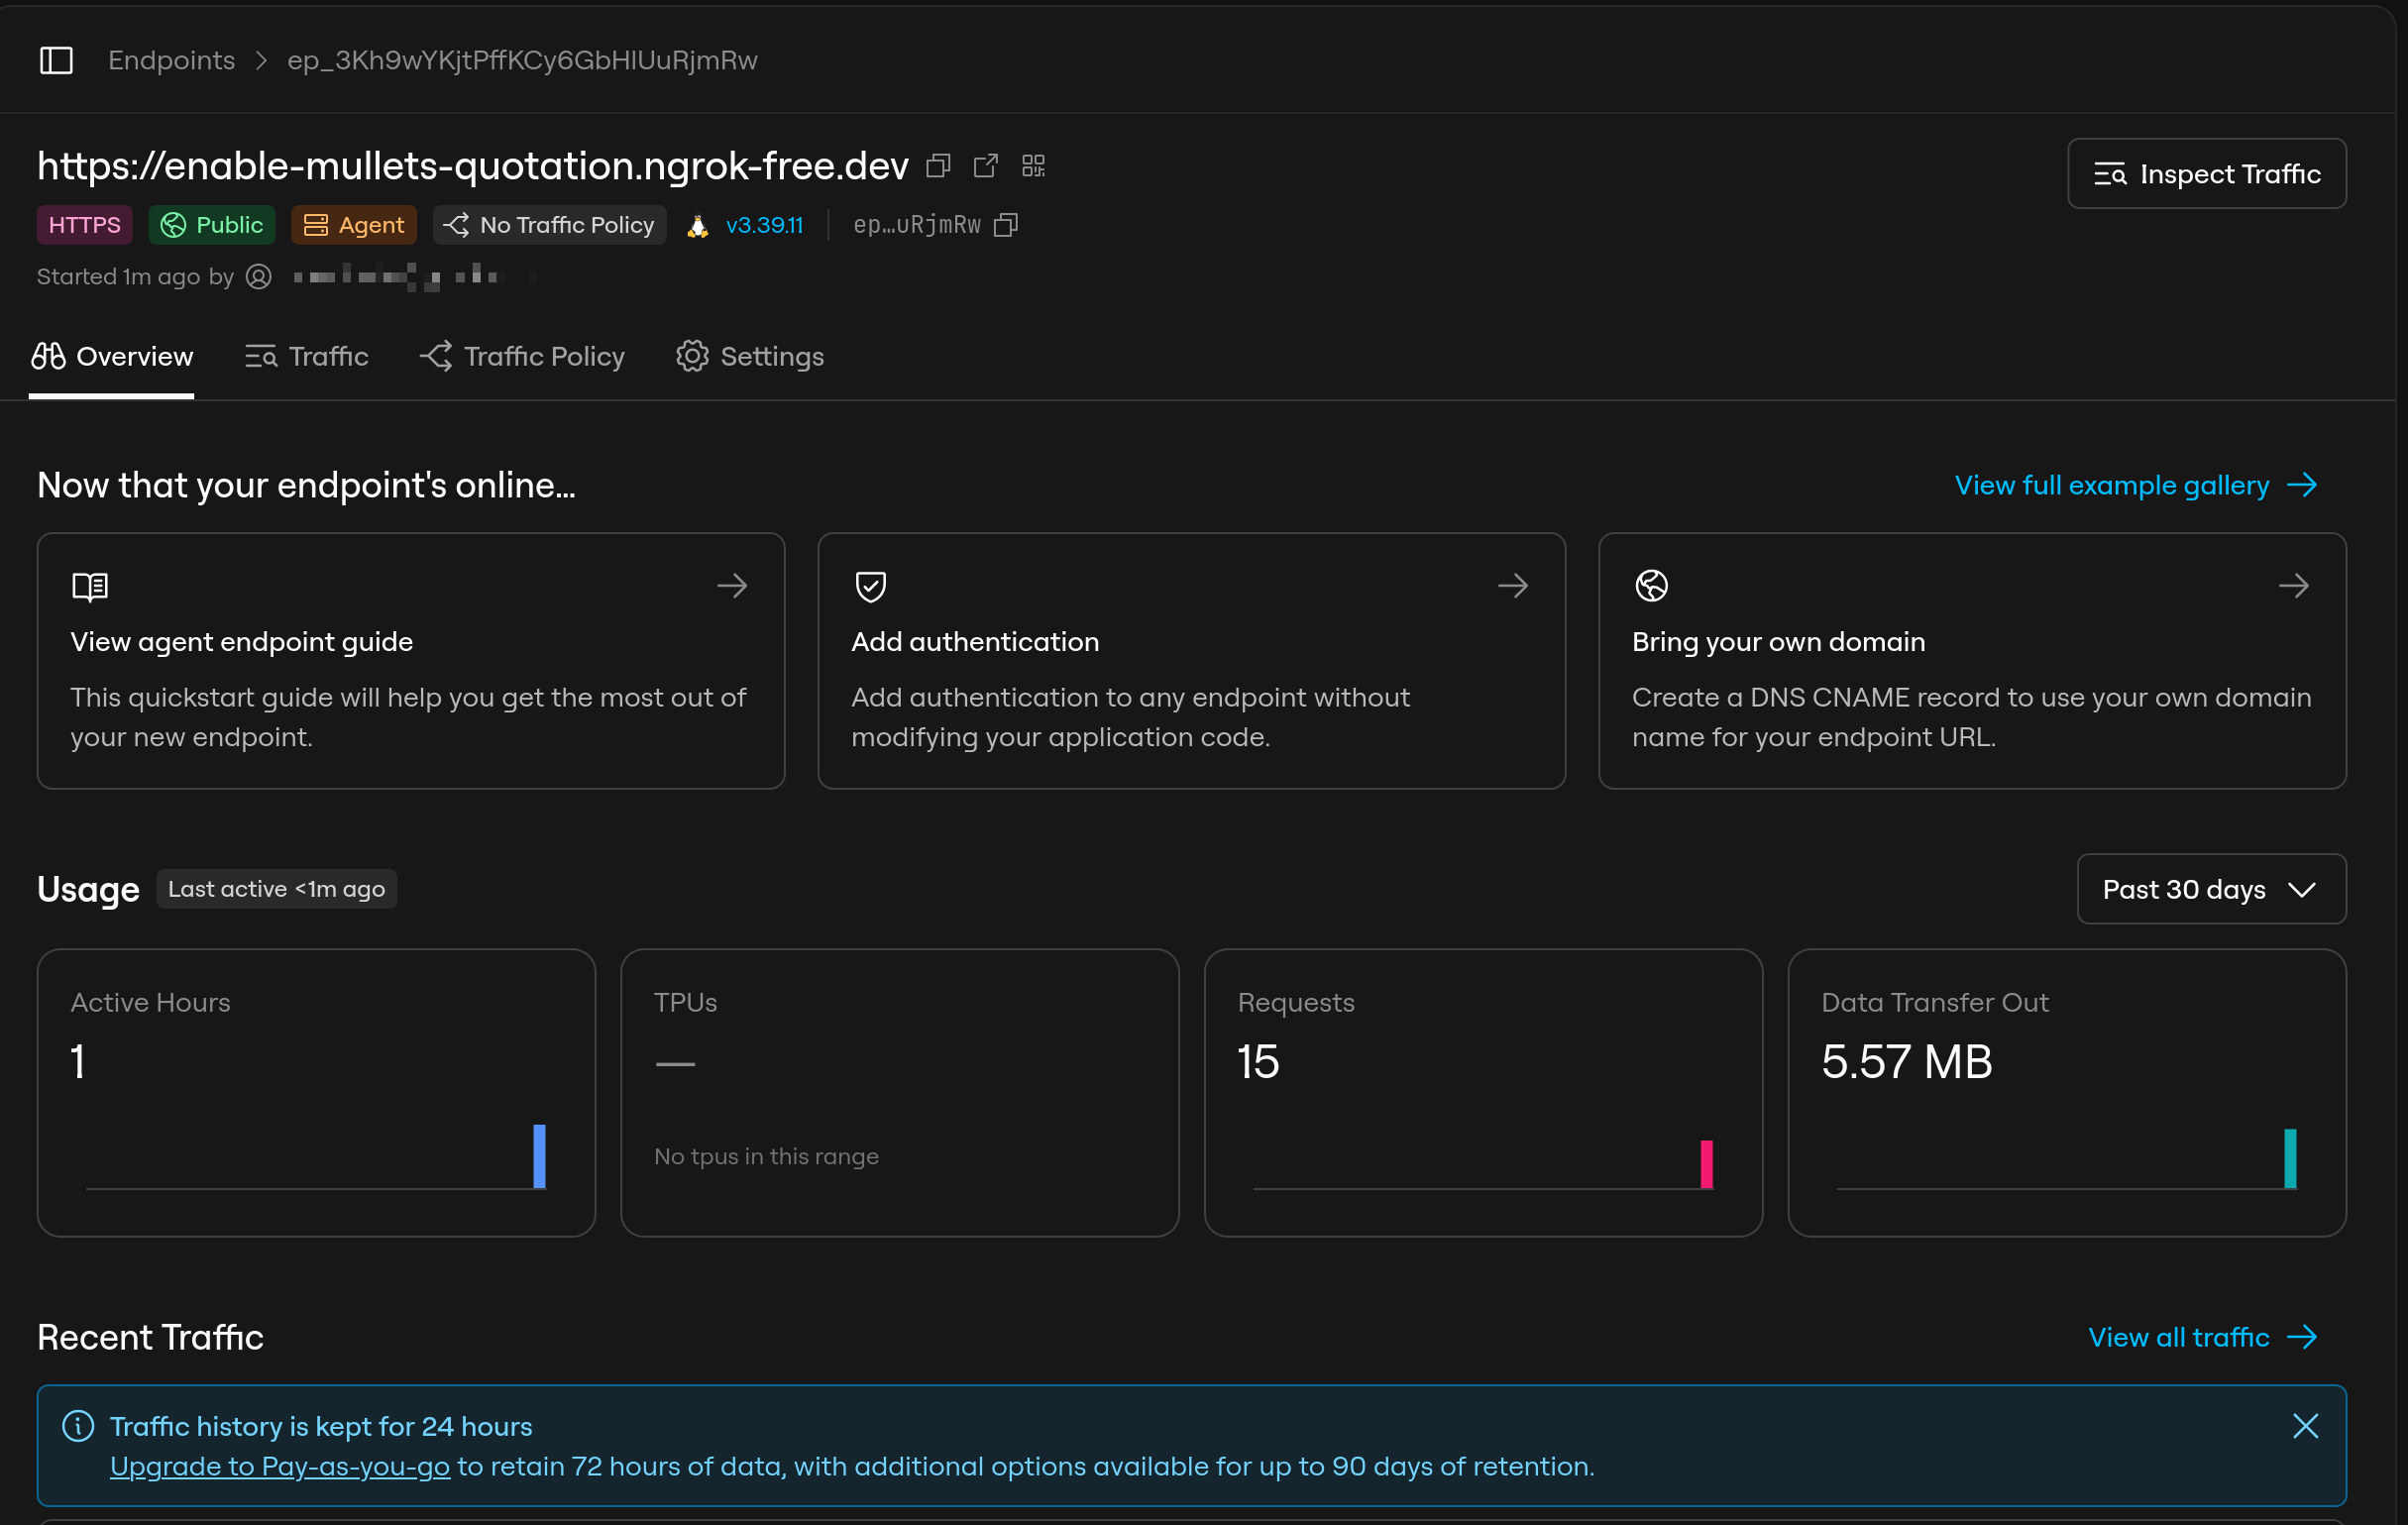
- Ngrok assigns a public URL on a dev domain, such as
https://enable-mullets-quotation.ngrok-free.app, over HTTPS. - The status displays as Online (
HTTPS | Public | Agent). - The Inspect Traffic button allows monitoring incoming requests in real time.
Open the generated link on your smartphone or laptop. You should see the A-Parser dashboard.
Free Tier Browser Warning: When you open the link in a browser, Ngrok displays a warning page: “You are about to visit…”. This is standard for the free tier. Clicking Visit Site sets a cookie that suppresses the page for 7 days, after which it may reappear.
If you are querying the A-Parser API from Python or Node.js scripts, include the following HTTP header:
ngrok-skip-browser-warning: 1.
10. Summary & Comparison: Cloudflare vs. Ngrok vs. VPS
| Feature | VPS / Dedicated Server | Option 1: Cloudflare Tunnel | Option 2: Ngrok (Free) |
|---|---|---|---|
| Monthly Cost | Monthly billing; depends on the provider and configuration | $0 USD | $0 USD |
| Credit Card | Required for payment | Not required for the tunnel | Not required |
| Custom Domain | Optional (or server IP address) | Required (delegated to Cloudflare) | Not required (free dev domain provided) |
| Tunnel Limits | Not applicable; bandwidth depends on the hosting plan | No separate Tunnel traffic quota is listed for this setup (no traffic quota specified in Cloudflare limits) | 1 GB outbound transfer & 20,000 HTTP requests / mo (free tier) |
| Hardware Resources | Constrained by VPS tier | Local PC; depends on hardware specs | Local PC; depends on hardware specs |
| Internet Uplink | Often metered or capped | Depends on local ISP plan | Depends on local ISP plan |
| Access Protection | Depends on firewall and authentication configuration | A-Parser authentication; Cloudflare Access is optional | A-Parser authentication; additional access controls depend on the Ngrok configuration |
| URL Type | Server IP address or custom domain | Custom domain (aparser.my-domain.com) | Dev domain xxx.ngrok-free.app |
Summary:
- Have a domain on Cloudflare? Use Cloudflare Tunnel. You can configure it in the main dashboard, use a custom address such as
aparser.my-domain.com, and optionally add Cloudflare Access. - Do not have a domain? Use Ngrok. It provides a dev domain linked to your account and a URL for remote access to A-Parser. Keep the free plan limits in mind: 1 GB outbound transfer and 20,000 HTTP requests per month. For periodic dashboard access, these limits may be sufficient because scraping traffic does not pass through the tunnel.